
We have been excitedly trying out a wealth of new products with our new VersiFlex Solution. We’ll count down our favorites and suggest you try them out as well!

10) Wood, Ceramic, and Stone Coasters
Coasters are a great addition to any living or dining space. They add that personal flare, whether it’s a family photo, favorite saying, or monogram on display. While there are a variety of coaster blanks for sublimation, your variety increases even more with the addition of unglazed stones and ceramics plus uncoated wood.

9) Notebooks and Journals
You can personalize virtually any notebook or journal with the VersiFlex System and VersiFlex Light paper. This is also a product type where you may want to use your VersiFlex System with sublimation htv. This allows you the flexibility of using darker color or smooth texture covers. You just use your cutter software with the Sawgrass Print Utility and complete a print and cut.
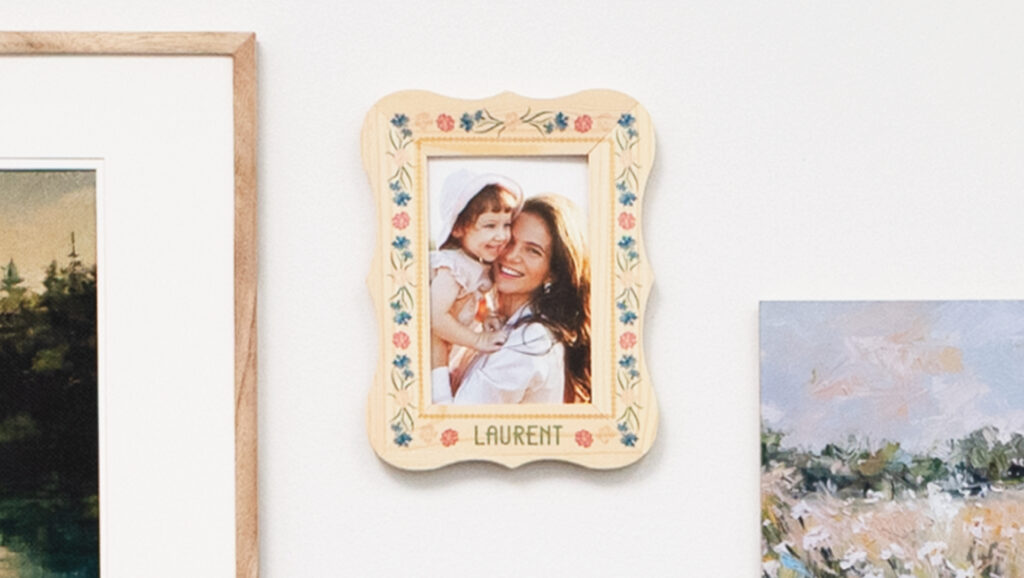
8) Wood Cut-Outs
Uncoated wood is easy to find and now is just as easy to press onto with the VersiFlex system and VersiFlex Light Paper. We know that there is a popular work around on the internet where you treat wood to use, but with VersiFlex that step is no longer required. Whether you pick up some great shapes, including frames, at a local dollar store or use a laser to create your own, these cut outs look great with a background pattern from the MySawgrass design tool and text of your choosing! You will need to carefully look over the wood to make sure that the grain is consistent, and the wood is flat and not warped, but beyond that, the possibilities are endless.
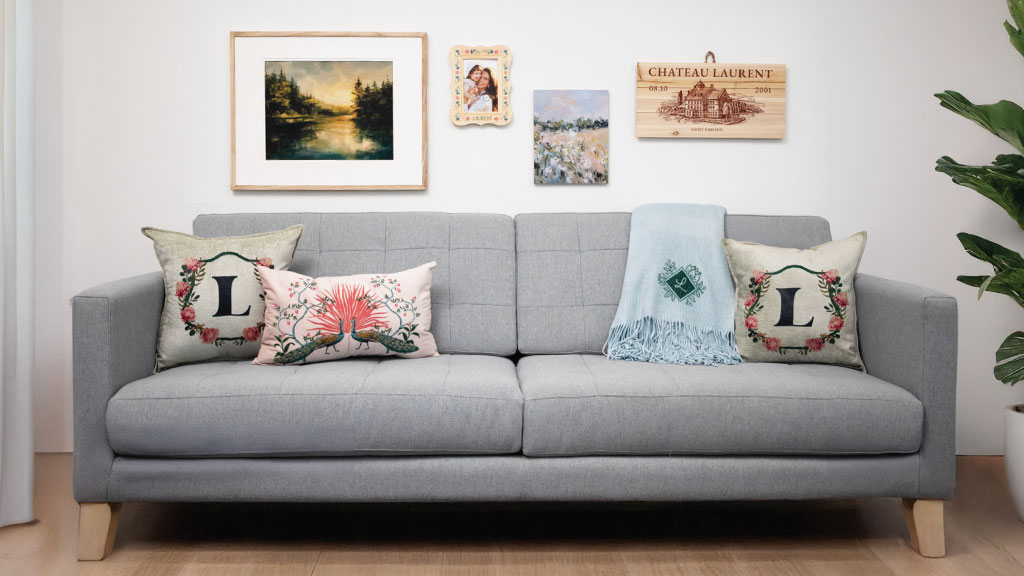
7) Home Décor
Whether you are an interior designer or just looking to add a personal touch to a living space, it’s easy with the VersiFlex System and VersiFlex Light paper. Pillows in a multitude of fabrics and throw blankets are some of the projects we have done. Whether it’s a favorite motif or a monogram, you can make any area your own with VersiFlex.
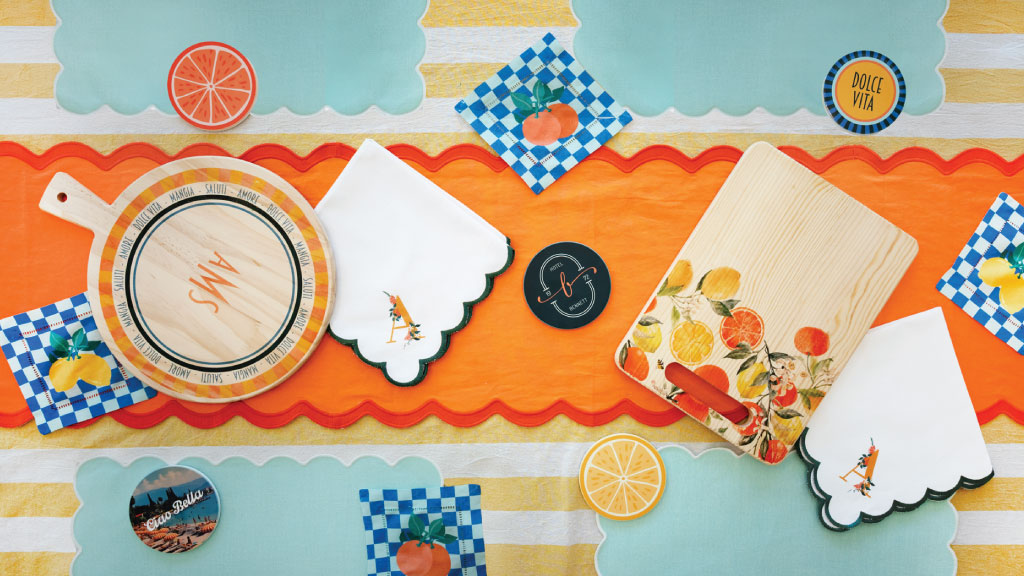
6) Party Décor
Adding a personal touch is easy with the VersiFlex System and VersiFlex Light paper. Whether it’s a monogram on a napkin or a personal motif on a table runner, any space can be make special with VersiFlex.
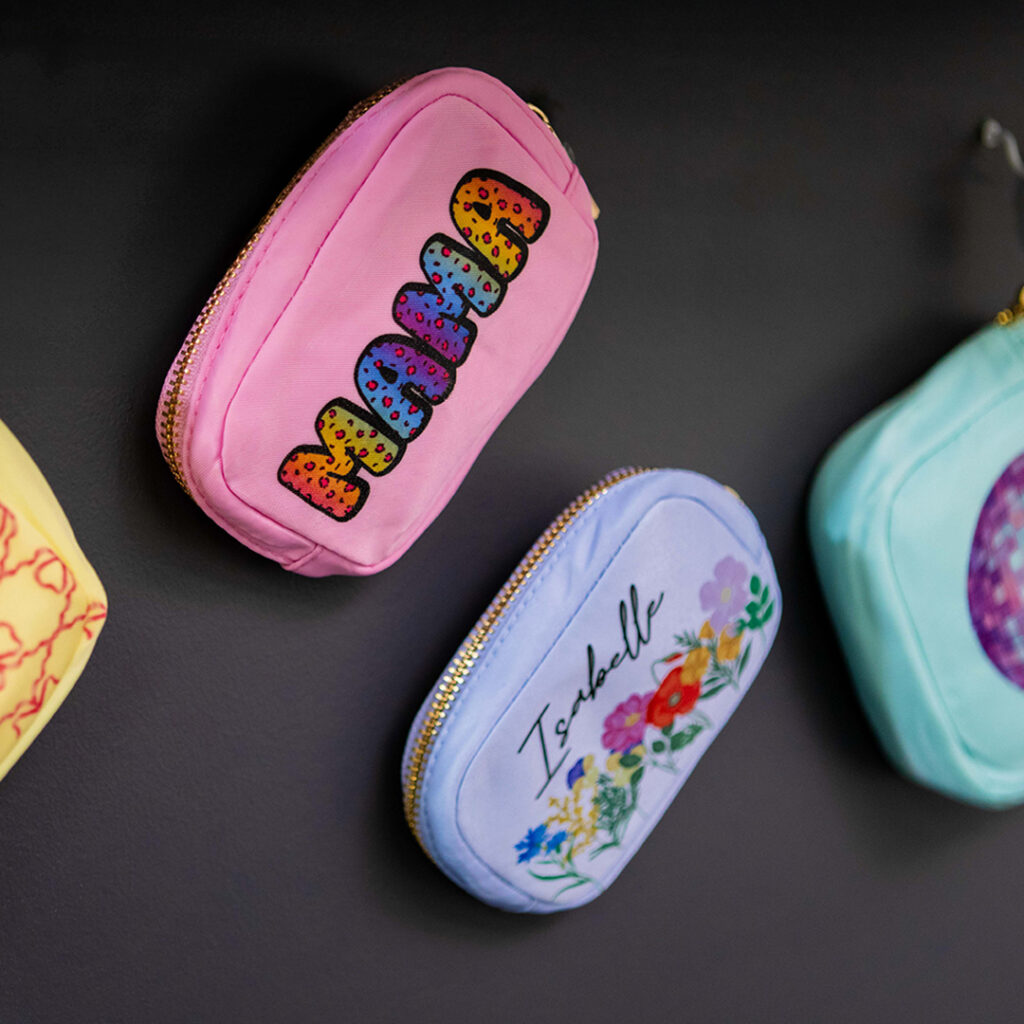
5) Nylon Bags and Pouches
Without a shadow of a doubt, this product add is the one that gets the greatest response when anyone sees our results. Nylon bags and pouches can be found in any craft store and are a great item to use with the VersiFlex System and VersiFlex Light paper. As with any item that is not flat, try to keep accessories like zippers outside of the press area and use a pressing pillow to create a flat and even surface.
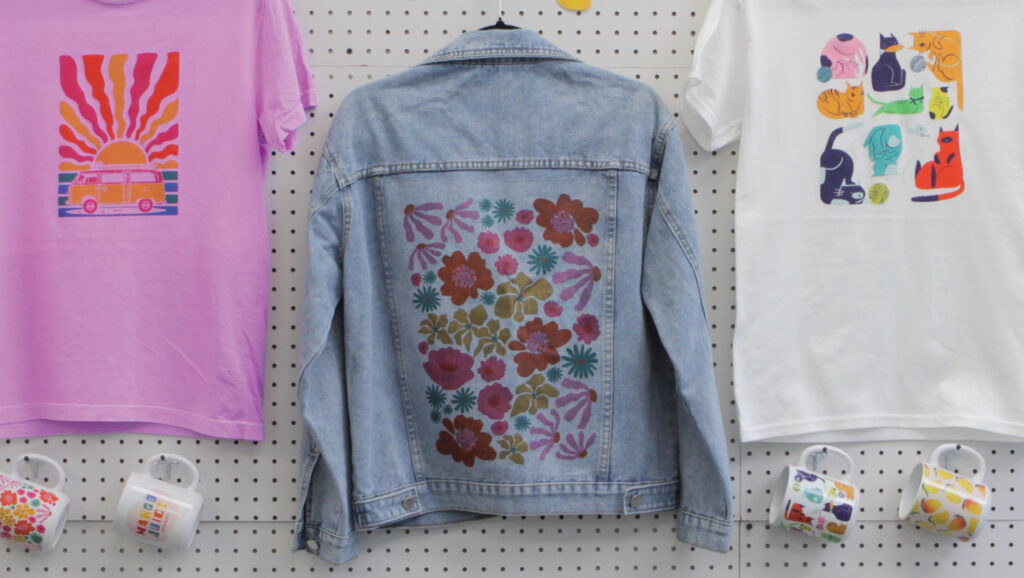
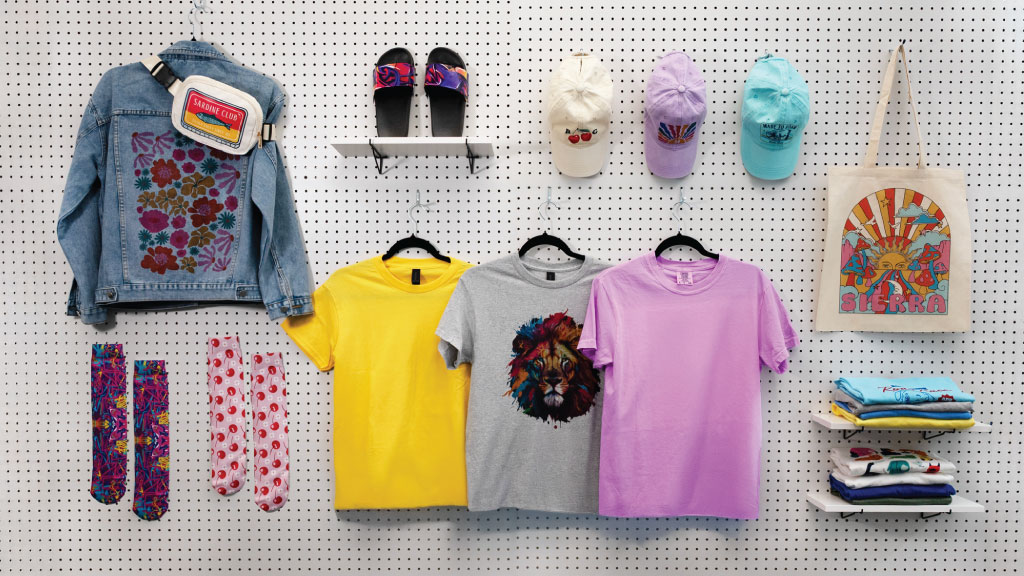
4) Denim Jackets and Jeans
We originally had not thought of using the VersiFlex System and VersiFlex Light paper with denim, but one of our testers opened our eyes to the possibilities. Whether it is adding a name or a personalized design to the back or a jacket, or adding a monogram or design to the pocket of jeans, the design possibilities are endless.

3) Cotton Hats
Much like the cotton t-shirts, cotton hats are a very exciting addition to what can be created with the VersiFlex system and VersiFlex Light paper. All you need is a hat press and the possibilities are virtually endless. Logos, designs with sayings, or monograms all look great with VersiFlex and light, bright, or white cotton hats.
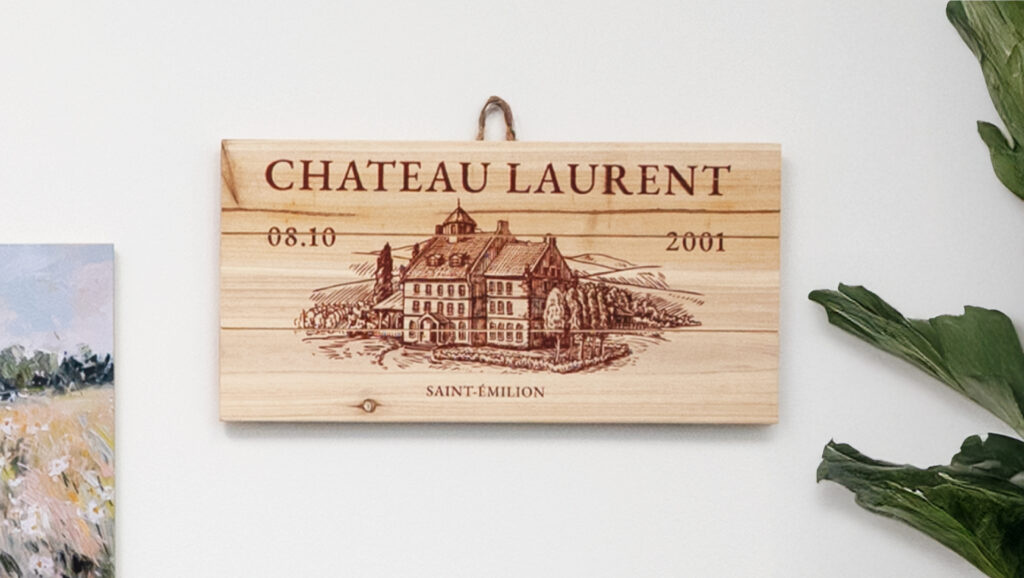
2) Wood Signage
Uncoated wood is easy to find and now is just as easy to press onto with the VersiFlex system and VersiFlex Light Paper. We know that there is a popular work around on the internet where you treat wood to use, but with VersiFlex that step is no longer required. One of our favorite projects is this sign made with a wood plaque we picked up at a local craft store. You will need to carefully look over the wood to make sure that the grain is consistent, and the wood is flat and not warped, but beyond that, the possibilities are endless.
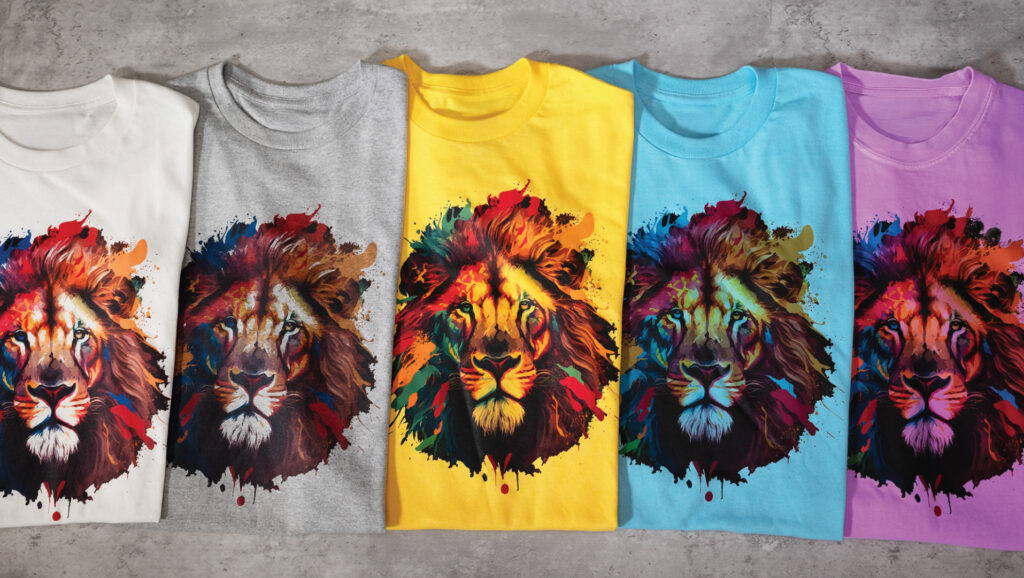
1) Cotton T-Shirts in all the colors
Whenever we ask anyone about the limitations of products you can use with sublimation, cotton is always at the top of everyone’s list. Sublimation users have tried a variety of papers and powders with limited success. With the VersiFlex system and VersiFlex Light paper, cotton t-shirts are now an easy addition to what you can produce. The process is as simple as print, press with heavy pressure, and then do a low, hot peel. Whether your shirt is a light, bright, or white color, all of these options look great with VersiFlex. Personalized shirts that you can make yourself without needing to order large quantities, are now right at your fingertips!
Those are our top ten new products to try with the VersiFlex System. We hope you enjoy these projects and many more!
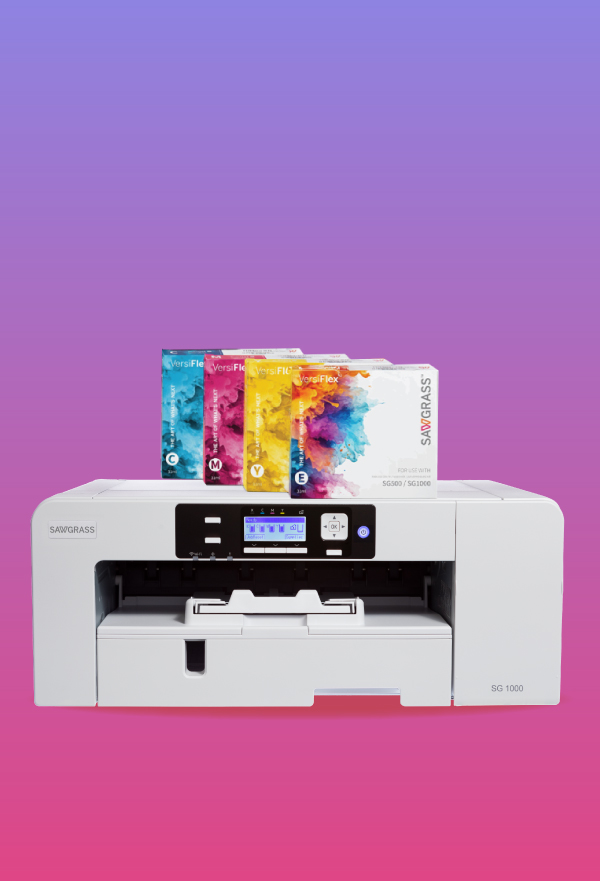
If you have not heard our exiting news, Sawgrass has added a new technology called VersiFlex. With the VersiFlex Solution, we have one ink set that allows you to do both traditional sublimation and press onto products like cotton and uncoated wood just by changing out the paper.
VersiFlex Offers You:
- Unmatched Versatility
With VersiFlex, you can seamlessly print on a wide range of materials – natural fabrics and woods, ceramics and metals and more, all with one system. Whether you’re making custom drinkware, apparel, or home textiles, you have the freedom to create exactly what you want without sacrificing quality. - Expanded Flexibility
Say goodbye to the complexity and expense of managing multiple machines, materials and processes. VersiFlex allows you to print MORE with our 3-in-1 system. Streamline your workflow, reduce operational costs, and unlock unlimited creative potential. - Durability & Reliability
With VersiFlex, you get the same Sawgrass promise of quality and durability no matter what you’re printing on. - Cost Reduction
By eliminating the need for multiple ink systems, specialty equipment and consumables for different materials, VersiFlex offers a more cost-effective approach. Streamline your inventory and reduce overhead with a single, multi-functional system for all your printing needs. - Clean Ingredients
VersiFlex is crafted with clean, non-carcinogenic ingredients, offering a safer alternative to some printing methods that contain harmful chemicals and solvents. Print with peace of mind, deliver vibrant, durable prints across a variety of fabrics, knowing you’re using a cleaner product that’s safe for both you and your loved ones. - Environmentally Friendly
Thanks to the VersiFlex patented process, you can print with less waste, ensuring that your production processes are more sustainable and eco-friendly. VersiFlex reduces the need for excess ink and chemicals, making it a more environmentally conscious choice. - Hand Feel
Whether it’s soft cotton or linen, VersiFlex delivers a smoother, more flexible feel. while maintaining the wash fastness you expect from high-quality prints, ensuring your designs stay vibrant and intact after countless washes. It’s the best of both worlds—comfort and performance. - Performance-Level Printing
VersiFlex takes the high-quality performance of industrial-grade DTG and DTF printing and brings it to a compact, desktop-friendly format that’s easy for anyone to use. With VersiFlex, you get industrial-level quality and efficiency at a fraction of the size, cost, and complexity—making it accessible to small businesses, creatives, and entrepreneurs.
As you can see, the VersiFlex Solution offers you several advantages over other technologies by offering you endless possibilities with one system.
When purchasing a Sawgrass Printer, you also have to choose which ink set you will be using. Because our inks are so different, the ink you choose to start with will be the one that you use in the printer throughout it’s life. For that reason, you do have a decision to make. To pick the right ink for you, consider what products you will be making.
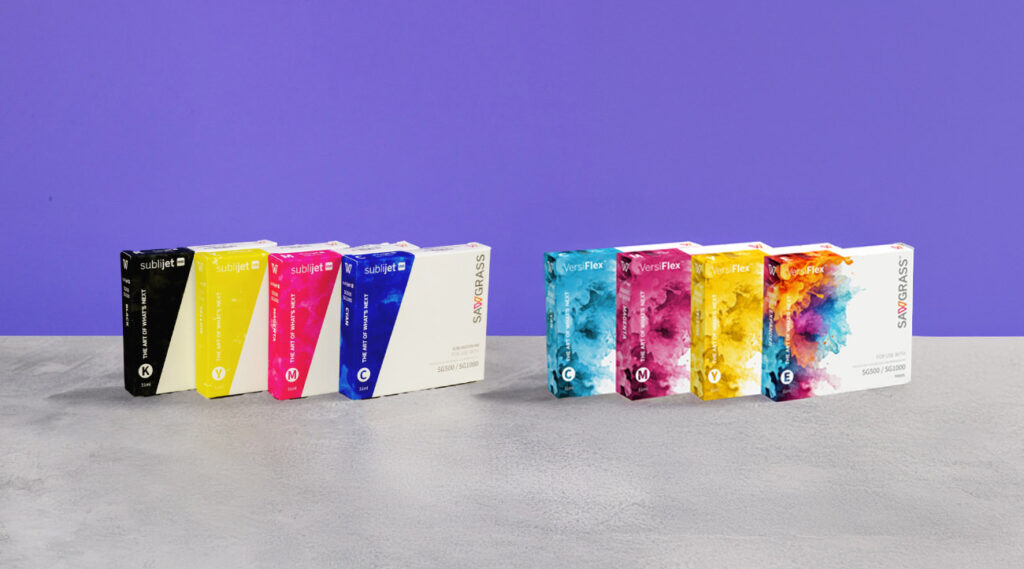
Sublimation is a process where your ink before a gas when heated. When Sublijet UHD is printed on TruPix paper and pressed onto a poly coated product, the ink becomes a part of the coating giving you a vibrant design that will last on your product. If you choose to use Sublijet UHD ink in your SG500 or SG1000, you can create a wide range of products by buy blanks from our Dealer network. This includes mugs, tumblers, polyester shirts, canvas totes, linen pillow cases, key chains, luggage tags, and much more.
Our VersiFlex Solution allows you to include cotton and other natural fabrics in your product collection as well as uncoated wood and unglazed ceramic products. When you choose to use the VersiFlex Ink Set with your SG500 or SG1000, you can do both traditional sublimation when you use the TruPix paper, and then press onto the non-poly coated products when you print onto the VersiFlex Light paper.
When deciding which of our inks to choose when purchasing a new SG500 or SG1000 printer, consider what you are hoping to do. If you are mostly going to be doing fabric, you would want to go with the VersiFlex ink so you can do cotton shirts without having to do a workaround or use another solution. With this solution you can still do tumblers and mugs. If you are going to be doing sublimation onto a variety of poly coated products and are not interested in doing cotton or uncoated wood, then the Sublijet UHD is the ink set for you.
A quality pressing result depends on a few things, but one of the most important is the temperature of your press.
If the temperature is incorrect for the product, you may see any of the following:
- Incorrect colors
- Faded Images
- Images that do not properly transfer
Here are some important things to know about temperature:
- Make sure you are setting the press to the correct temperature
We often take for granted that most items sublimate at 400(F)/200(C) degrees. For our VersiFlex Solution, most things press at 375(F)/191(C) degrees. Though this is typical, it is not always the truth. For instance, sublimation on polyester fabric is done at a lower temperature. You can use our Heat Press Guide, which is under the Help tab in the Sawgrass Print Utility, or check the settings provided by your dealer, to make sure that you are setting your press to the right temperature. - Verify that the press temperature is accurate
Setting your press to the right temperature is only half of the battle. Presses may not be properly calibrated and could be showing the right temperature but producing something very different. Having a thermometer gun on hand will help you check the temp and compensate by adjusting up or down. You can also check with your dealer for steps to calibrate your press.
Correctly setting and then verifying your press temperature are good ways that you get consistently successful results when printing and pressing.

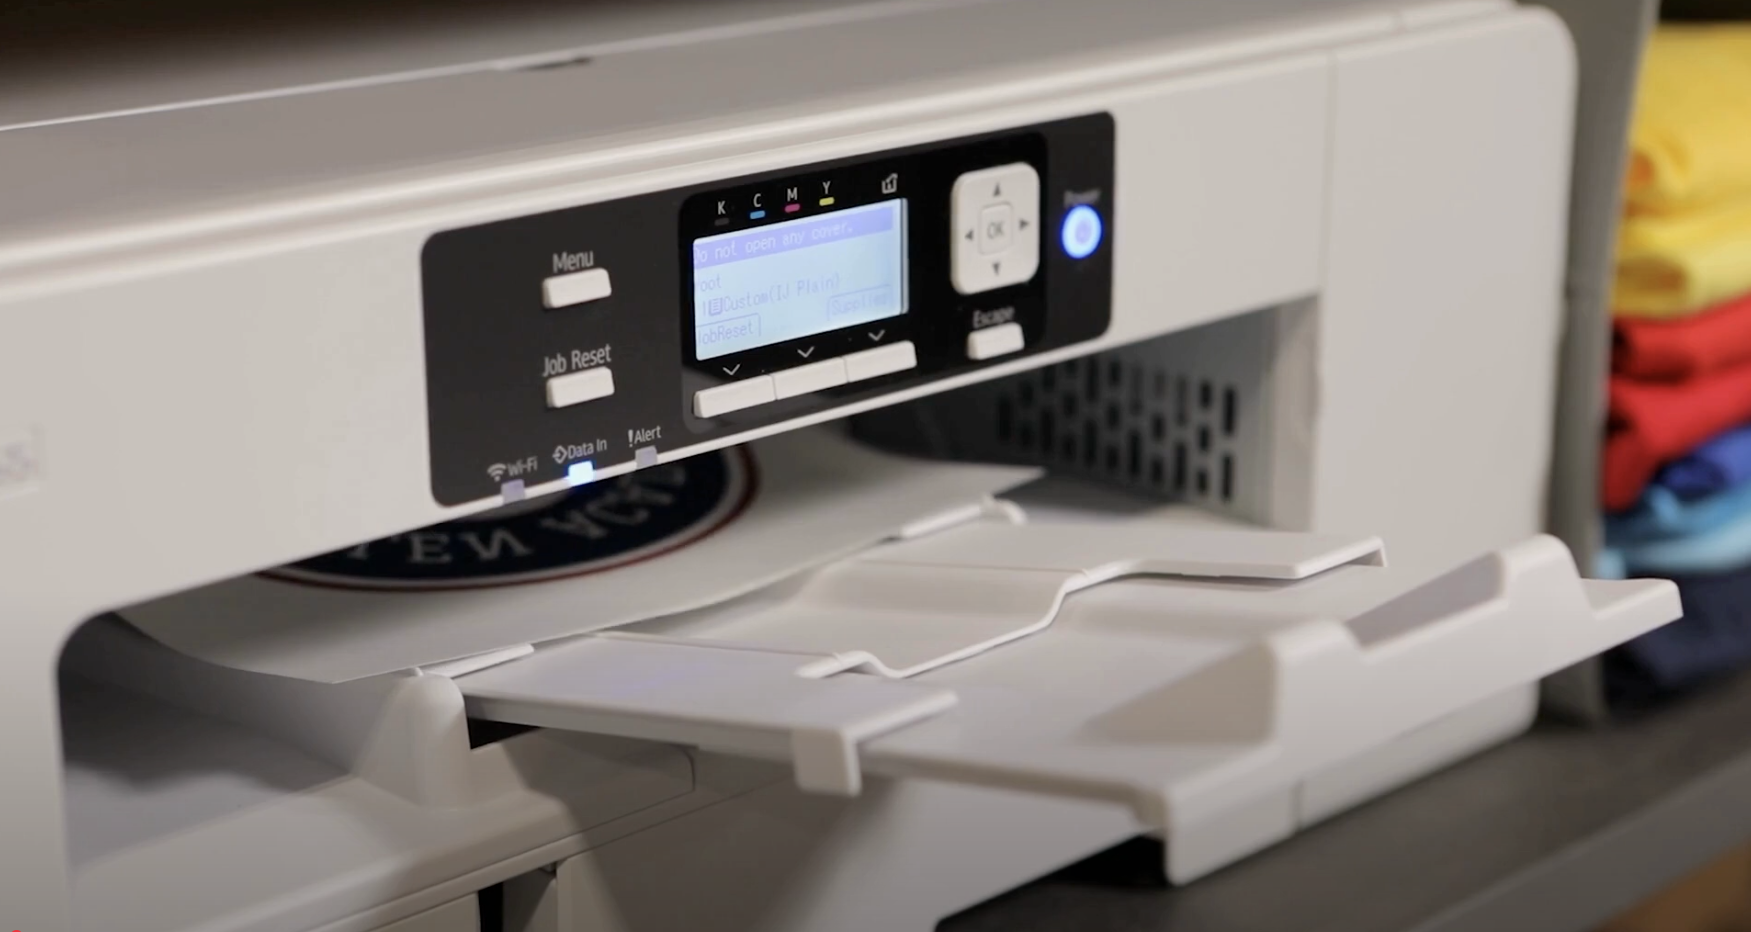
When you purchase your Sawgrass SG 1000 printer, it comes with one main tray that sits underneath the printer. This tray is designed for up to 11” by 17” or A3 paper and can be adjusted to accommodate down to standard mug paper. While the tray is configured to hold 8.5” x 11” (A4) paper, the tray does expand to hold 11”x17” (A3) paper.
One of the additional trays that you can purchase for your SG1000 is a Bypass Tray. The Bypass tray attached to the rear of the printer allows you to use paper that is longer than what will fit in the main tray of the printer. Paper placed in this tray on an SG1000 can be a maximum of 13” inches wide and can be as long as 51”. This tray allows you to utilize both 12” x 18” and 13” x 19” (A3+) paper.
The bypass tray can be used if you are switching between two papers like your TruePix Classic and VersiFlex Light papers. However, we do to recommend storing paper in the bypass tray as it can become curled from not being flat. Paper would need to be removed from the bypass tray and stored after use.
The greatest benefit of adding a bypass tray to your SG1000 is that you can now print larger designs that can be used for items with larger print areas such as tote bags, pillows, and shirt designs which will extend the range of products that you can make and sell.
Once your tray is installed, to choose your paper source, you will just select the correct tray in the Sawgrass Print Utility.
For assistance with installing your Bypass Tray, please visit our Knowledge Base article on the topic.
When you purchase your Sawgrass SG 1000 printer, it comes with one main tray that sits underneath the printer. This tray is designed for up to 11” by 17” or A3 paper and can be adjusted to accommodate down to standard mug paper. While the tray is configured to hold 8.5” x 11” (A4) paper, the tray does expand to hold 11”x17” (A3) paper.
One of the additional trays that you can purchase is an Option Tray. This tray functions just like the main tray and sits underneath the printer as well and fits beneath the main tray. The option tray is a great, well, option for you if you regularly use multiple sizes of paper or are using the VersiFlex solution and need both TruPix Classic paper to use with traditional sublimation products and VersiFlex Light paper for use with natural fibers and uncoated products. The optional tray on the SG1000 will hold the same paper sizes as the main tray.
Having to switch out paper requires external storage, increases wear and tear on the tray, needing to remember what paper is in the tray, and keeping track of what side is the pintable side of the paper.
Once your tray is installed, to choose your paper source, you will just select the correct tray in the Sawgrass Print Utility.
For assistance with installing your Option Tray, please visit our Knowledge Base article on the topic.
When you purchase your Sawgrass SG 500 printer, it comes with one main tray that sits underneath the printer. This tray is designed for 8.5” by 11” or A4 paper and can be adjusted to accommodate the smaller standard mug paper. In the US model, the tray expands to hold 8.5” x 14” paper.
One of the additional trays that you can purchase for your SG500 is a Bypass Tray. The Bypass tray attached to the rear of the printer allows you to use paper that is longer than what will fit in the main tray of the printer. Paper placed in this tray can be a maximum of 8.5” inches wide and can be as long as 51”.
The bypass tray can be used if you are switching between two papers like your TruePix Classic and VersiFlex Light papers. However, we do to recommend storing paper in the bypass tray as it can become curled from not being flat. Paper would need to be removed from the bypass tray and stored after use.
The main benefit of using the bypass tray with the SG500 is that you can print longer items such as socks, ties, and ribbons to make hair bows.
Once your tray is installed, to choose your paper source, you will just select the correct tray in the Sawgrass Print Utility.
For assistance with installing your Bypass Tray, please visit our Knowledge Base article on the topic.

When you purchase your Sawgrass SG 500 printer, it comes with one main tray that sits underneath the printer. This tray is designed for 8.5” by 11” or A4 paper and can be adjusted to accommodate the smaller standard mug paper. In the US model, the tray expands to hold 8.5” x 14” paper.
One of the additional trays that you can purchase is an Option Tray. This tray functions just like the main tray and sits underneath the printer as well and fits beneath the main tray. The option tray is a great, well, option for you if you regularly use multiple sizes of paper or are using the VersiFlex solution and need both TruPix Classic paper to use with traditional sublimation products and VersiFlex Light paper for use with natural fibers and uncoated products. The optional tray on the SG500 will hold the same paper sizes as the main tray.
Having to switch out paper requites external storage, increases wear and tear on the tray, needing to remember what paper is in the tray, and keeping track of what side is the pintable side of the paper.
Once your tray is installed, to choose your paper source, you will just select the correct tray in the Sawgrass Print Utility.
For assistance with installing your Option Tray, please visit our Knowledge Base article on the topic.
Skill Level: Intermediate
Tools & Supplies to Make It:
- MySawgrass+ Membership
- Sawgrass SG500 or SG1000 Printer
- Sawgrass VersiFlex Inks
- 8.5″ x 11″ or larger VersiFlex Light Paper
- Flat Press
- Yellow cotton, or cotton blend, shirt
- Heat Tape
How to Create It:
- Log into MySawgrass and from the Landing Page choose Design.
- For your product, select the 8.5″ x 11″ Blank Sheet by opening the Blank Sheets category or by using the search bar.
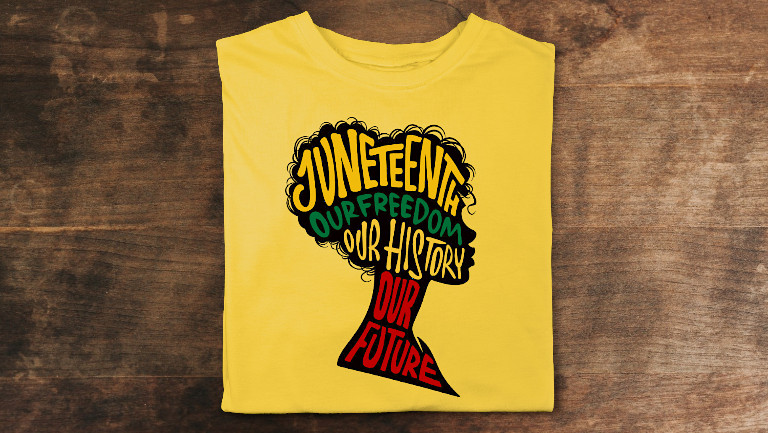
- On the Create Your Design Panel, click on Designs. Click on the filter icon and then select the Juneteenth Category and click apply.
- Choose the Our History design.
- Click and drag your mouse to select the entire design and then use the resize icon to fit the design in the area and reposition it.
- Once the design is complete, hit the Print button and then on the Print Screen click on Print File.
How to Print It:
- You should get a popup that asks if you want to open Sawgrass Print Utility. You will need to click Open Sawgrass Print Utility. If you are not seeing this, you’ll need to disable your popup blocker.
- In Sawgrass Print Utility, start by scrolling down and making sure your print orientation is set to Portrait.
- For this project, choose Cotton as your Product.
- Make sure that the media size and type match what you have in the printer.
- On the Color Management Tab, we suggest having the Color Mode set to Vivid.
- When you’ve confirmed all of your settings, Hit Print.
How to Press It:
- Turn your press on and set the temperature to 375 degrees and the time to 30 seconds.
- Set your pressure to very high. This will be over 40 psi. If you have a manual press, you want it to so tight that it takes a little force to open.
- Use a lint roller to remove any dust from your shirt
- Place your shirt in the press, cover with a sheet of blow out paper and pre-press for 10 seconds.
- Place the print facedown on the shirt and close the press
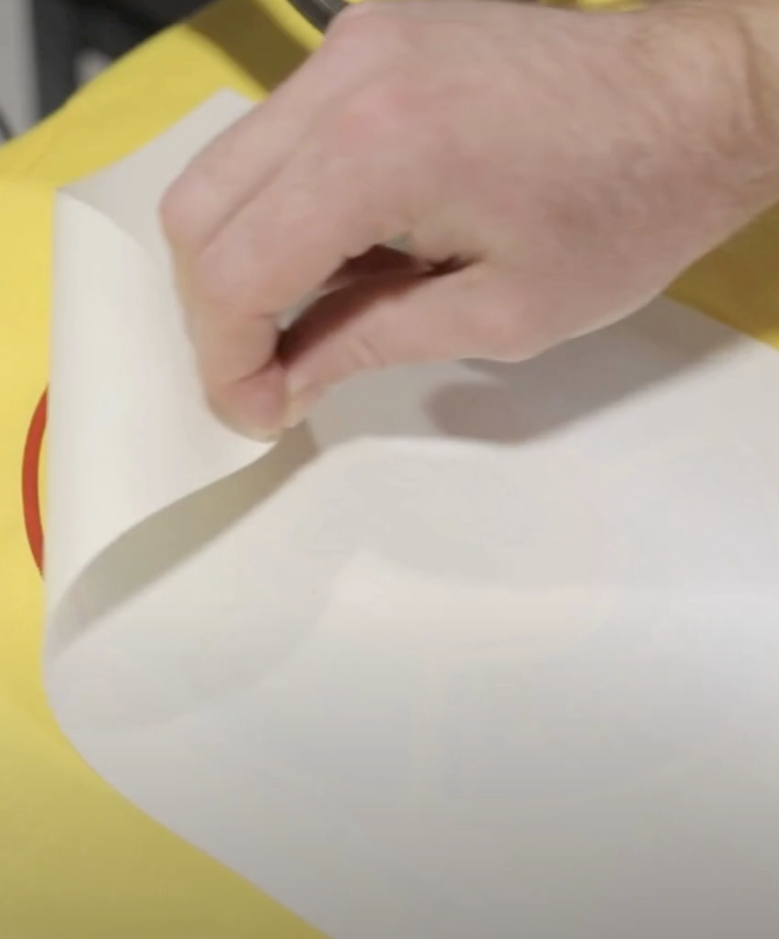
- Wait 30 seconds before lifting the lid and removing the shirt. Peel design from shirt immediately.
Tips & Tricks:
- With VersiFlex ink and VersiFlex Light paper, you want to get the print onto the shirt as quickly as possible. Since it will be wet, you cannot reposition the design and do not need to use heat tape.
- We are describing removing the paper after pressing as a low, hot peel. If you are getting too much resistance when peeling, increase your pressure. If you cannot increase the pressure, increase the time and temperature.

Skill Level: Beginner
Tools & Supplies to Make It:
- MySawgrass+ Membership
- Sawgrass SG500 or SG1000 Printer
- Sawgrass Sublijet UHD Inks
- TruePix paper
- Mug or Tumbler Press
- 8.5”x11” or larger sublimation paper
- Pink Inner Sparkle Ceramic Mug
- Heat Tape
How to Create It:
- Log into MySawgrass and from the Landing Page choose Design.
- For your product, select the 11oz Pink Inner Sparkle Mug by opening the Drinkware category or by using the search bar.
- On the Create Your Design Panel, click on Designs. Click on the filter icon and then select the Inspiration category and click apply.
- Choose the Goes Right design.
- Click and drag your mouse to select the entire design and then use the resize icon to fit the design in the area and reposition it where you want on the mug.
- If you’d like to add a name or other text, click on Fonts on the Create Your Design Panel.
- Once the design is complete, hit the Print button and then on the Print Screen click on Print File.
How to Print It:
- You should get a popup that asks if you want to open Sawgrass Print Utility. You will need to click Open Sawgrass Print Utility. If you are not seeing this, you’ll need to disable your popup blocker.
- In Sawgrass Print Utility, start by scrolling down and making sure your print orientation is set to Landscape.
- For this project, use the preset for Ceramic Drinkware.
- Make sure that the media size and type match what you have in the printer.
- On the Color Management Tab, we suggest having the Color Mode set to Vivid.
- When you’ve confirmed all of your settings, Hit Print.
How to Press It:
- Turn your press on and set the temperature to 400 degrees and the time to 4.5 minutes.
- To remove any dust, wipe down the mug with alcohol and a lint free cloth.
- Tape your image down to the mug
- Place the mug in the heat press and close.
- Wait 4 and a half minutes before lifting the lid and removing the mug.
Tips & Tricks:
- If you’d like to place the design on both sides of the mug, position the design on one side using the green lines to center it and then with the design selected, choose duplicate from the right panel.
- To save paper you can place multiples of this image on your page. In the Sawgrass Print Utility, under Design Files, increase your number under repeat and then use spacing to arrange them on your page.