
Skill Level: Intermediate
Tools & Supplies to Make It:
- MySawgrass+ Membership
- Sawgrass SG500 or SG1000 Printer
- Sawgrass Sublijet UHD Inks
- TruePix paper
- Flat Press
- 8.5”x11” or larger sublimation paper
- Acrylic Keychain
- Heat Tape
How to Create It:
- Log into MySawgrass and from the Landing Page choose Design.
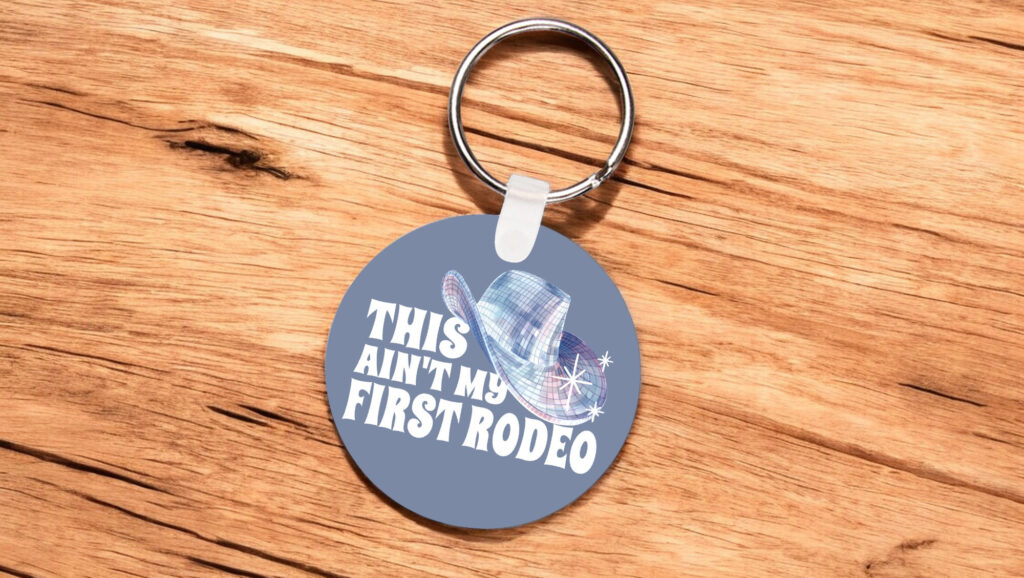
- For your product, select the Acrylic Round Keyring by opening the Accessories category or by using the search bar.
- On the Create Your Design Panel, click on Designs. Click on the filter icon and then select the Country Living category and click apply.
- Choose the First Rodeo design.
- Click and drag your mouse to select the entire design and then use the resize icon to fit the design in the area and reposition it.
- You can change the text by clicking on the text field and then edit it by using the text panel on the left.
- Once the design is complete, hit the Print button and then on the Print Screen click on Print File.
How to Print It:
- You should get a popup that asks if you want to open Sawgrass Print Utility. You will need to click Open Sawgrass Print Utility. If you are not seeing this, you’ll need to disable your popup blocker.
- In Sawgrass Print Utility, start by scrolling down and making sure your print orientation is set to Landscape.
- For this project, use the preset for Acrylic Sign/Plaque.
- Make sure that the media size and type match what you have in the printer.
- On the Color Management Tab, we suggest having the Color Mode set to Vivid.
- When you’ve confirmed all of your settings, Hit Print.
How to Press It:
- Turn your press on and set the temperature to 360 degrees and the time to 120 seconds.
- Check to see if there is plastic on the front of the keychain and remove it.
- To remove any dust, wipe down the keychain with alcohol and a lint free cloth.
- Tape your image down to the keychain.
- Place the keychain in the heat press and close.
- Wait 120 seconds before lifting the lid and removing the keychain.
Tips & Tricks:
- With acrylic and glass, the image is pressed onto the back and viewed from the front. Mirror needs to be off before printing.
- To save paper you can place multiples of this image on your page. In the Sawgrass Print Utility, under Design Files, increase your number under repeat and then use spacing to arrange them on your page.
Skill Level: Beginner
Tools & Supplies to Make It:
- MySawgrass+ Membership
- Sawgrass SG500 or SG1000 Printer
- Sawgrass Sublijet UHD Inks
- TruePix paper
- Flat Press
- 8.5”x11” or larger sublimation paper
- Hardboard Fridge Magnet
- Heat Tape
How to Create It:
- Log into MySawgrass and from the Landing Page choose Design.
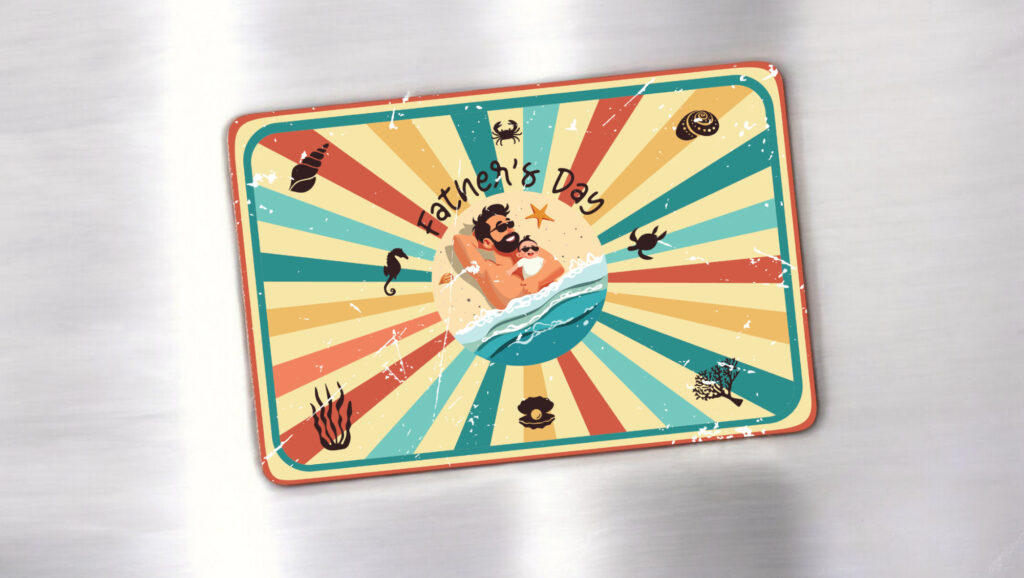
- For your product, select the Hardboard Fridge Magnet by opening the Home Decor category or by using the search bar.
- On the Create Your Design Panel, click on Designs. Click on the filter icon and then select the Dad category and click apply.
- Choose the Beach design.
- You can grab elements of the design to change the size and to change the colors. Colors can be changed in the left panel once an element is selected.
- You can change the text by clicking on the text field and then edit it by using the text panel on the left.
- Once the design is complete, hit the Print button and then on the Print Screen click on Print File.
How to Print It:
- You should get a popup that asks if you want to open Sawgrass Print Utility. You will need to click Open Sawgrass Print Utility. If you are not seeing this, you’ll need to disable your popup blocker.
- In Sawgrass Print Utility, start by scrolling down and making sure your print orientation is set to Landscape.
- For this project, use the preset for Hardboard Coaster.
- Make sure that the media size and type match what you have in the printer.
- On the Color Management Tab, we suggest having the Color Mode set to Vivid.
- When you’ve confirmed all of your settings, Hit Print.
How to Press It:
- Turn your press on and set the temperature to 400 degrees and the time to 60 seconds.
- To remove any dust, wipe down the magnet with alcohol and a lint free cloth.
- Tape your image down to the magnet.
- Place the magnet in the heat press and close.
- Wait 60 seconds before lifting the lid and removing the magnet.
Tips & Tricks:
- This is a great design to personalize in the design tool by playing around with the colors and with the text to make it unique.
- To save paper you can place multiples of this image on your page. In the Sawgrass Print Utility, under Design Files, increase your number under repeat and then use spacing to arrange them on your page.

Skill Level: Beginner
Tools & Supplies to Make It:
- MySawgrass+ Membership
- Sawgrass SG500 or SG1000 Printer
- Sawgrass Sublijet UHD Inks
- TruePix paper
- Flat Press
- 8.5”x11” or larger sublimation paper
- Hexagon Ceramic Coaster
- Heat Tape
How to Create It:
- Log into MySawgrass and from the Landing Page choose Design.
- For your product, select the Hexagon Ceramic Coaster by opening the Kitchen & Dining category or by using the search bar.
- On the Create Your Design Panel, click on Designs. Click on the filter icon and then select Inspiration and click apply.
- Choose the Be the Energy design.
- Click and drag your mouse to select the entire design and then use the resize icon to fit the design in the area and reposition it.
- You can change the text by clicking on the text field and then edit it by using the text panel on the left.
- Once the design is complete, hit the Print button and then on the Print Screen click on Print File.
How to Print It:
- You should get a popup that asks if you want to open Sawgrass Print Utility. You will need to click Open Sawgrass Print Utility. If you are not seeing this, you’ll need to disable your popup blocker.
- In Sawgrass Print Utility, start by scrolling down and making sure your print orientation is set to Portrait.
- For this project, use the preset for Ceramic Coaster.
- Make sure that the media size and type match what you have in the printer.
- On the Color Management Tab, we suggest having the Color Mode set to Vivid.
- When you’ve confirmed all of your settings, Hit Print.
How to Press It:
- Turn your press on and set the temperature to 365 degrees and the time to 240 seconds.
- To remove any dust, wipe down the coaster with alcohol and a lint free cloth.
- Tape your image down to the coaster.
- Place the coaster in the heat press and close.
- Wait 240 seconds before lifting the lid and removing the coaster.
- Use gloves when removing product, it will be very hot!
Tips & Tricks:
- Because cermaic tiles can be fragile, watch that your pressure is not too high. You can also use a silicone pad in the press to help cushion the coaster.
- To save paper you can place multiples of this image on your page. In the Sawgrass Print Utility, under Design Files, increase your number under repeat and then use spacing to arrange them on your page.
Tools and Supplies to Make it:
- Sawgrass SG500 or SG1000 Printer
- Sawgrass VersiFlex Inks
- VersiFlex Light Paper
- Flat Heat Press
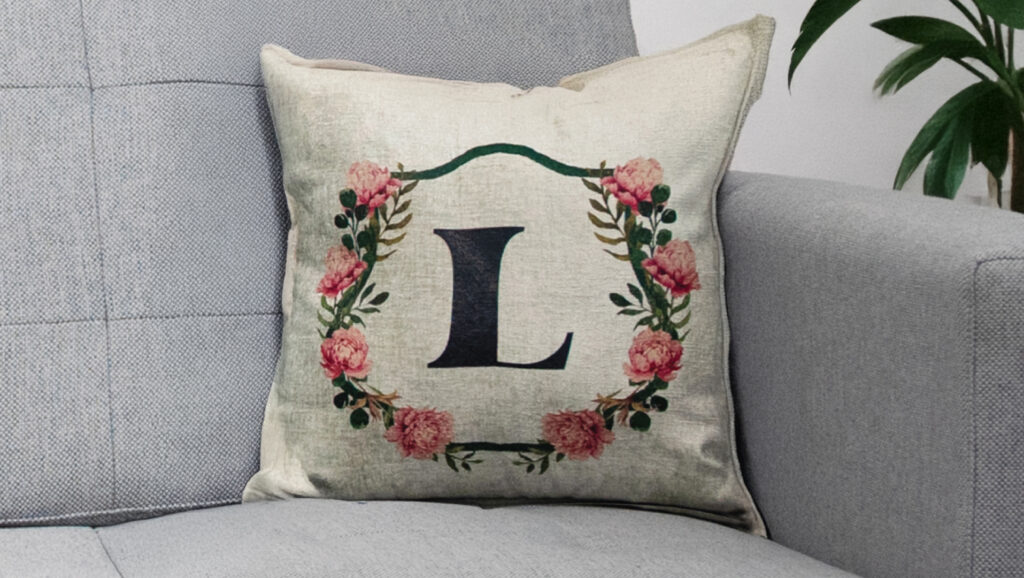
- Chenille Pillow Cover
How to Make It:
- For this project, we are using a chenille pillow cover we picked up at a local craft store
- In the Sawgrass Print Utility, we chose Natural Fabrics for the product.
- We printed this on 11″x17″ VersiFlex Light paper, but you can use smaller paper for a smaller design
How to Press It:
- Turn on your press on and set the temperature to 375F (191C) degrees
- If you see any dust, lint roll your print area to make sure your surface is clean.
- Place your fabrfic on the press and line the paper up on top as you place it on the product.
- Cover with blow out paper.
- Press the fabric for 30 seconds at VERY HIGH pressure.
- When finished, remove the fabric from the press and peel the paper off as quickly as possible.
Tips & Tricks:
- With cotton fabric, pressure and temperature are very important. Use a heat gun to check the temperature of your press. For a smooth result, have the pressure on your press as high as possible.
- You have flexibility with pillow covers to make the design as small or as large as you need to fit your printer and press.
Tools and Supplies to Make it:
- Sawgrass SG500 or SG1000 Printer
- Sawgrass VersiFlex Inks
- VersiFlex Light Paper
- Flat Heat Press
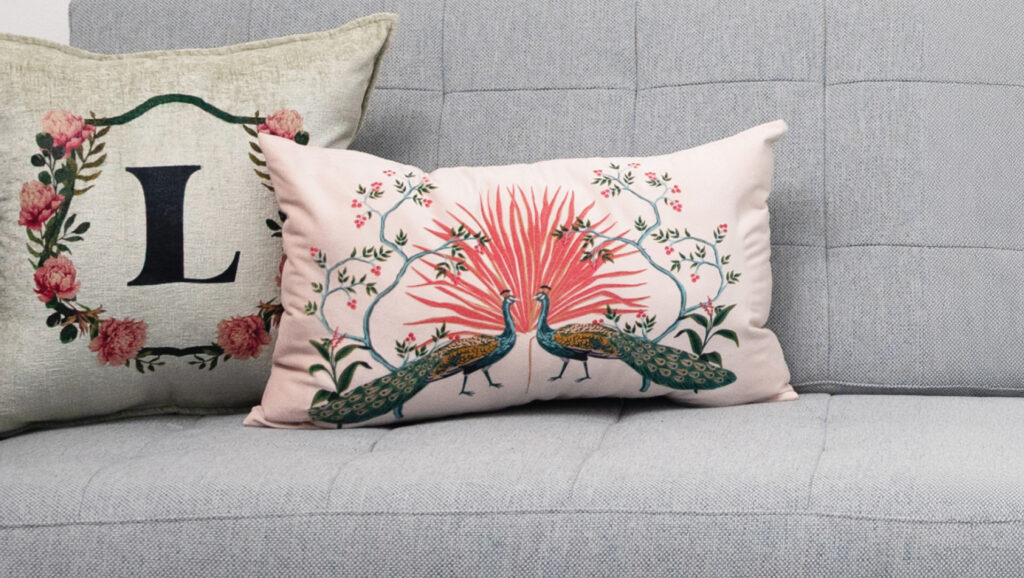
- Velvet Pillow Cover
How to Make It:
- For this project, we are using a velvet pillow cover we picked up at a local craft store
- In the Sawgrass Print Utility, we chose Natural Fabrics for the product.
- We printed this on 11″x17″ VersiFlex Light paper. B you have flexibility with pillow covers to make the design as small or as large as you need to fit your printer and press.
How to Press It:
- Turn on your press on and set the temperature to 375F (191C) degrees
- If you see any dust, lint roll your print area to make sure your surface is clean.
- Place your fabrfic on the press and line the paper up on top as you place it on the product.
- Cover with blow out paper.
- Press the fabric for 30 seconds at VERY HIGH pressure.
- When finished, remove the fabric from the press and peel the paper off as quickly as possible.
Tips & Tricks:
- With fabric, pressure and temperature are very important. Use a heat gun to check the temperature of your press. For a smooth result, have the pressure on your press as high as possible.
- This long style pillow would fit well with a design printed on 13″x19″ paper. This larger paper can be used with the bypass tray on an SG1000 printer.
Tools and Supplies to Make it:
- Sawgrass SG500 or SG1000 Printer
- Sawgrass VersiFlex Inks
- VersiFlex Light Paper
- Flat Heat Press
- Acrylic Knit Blanket
How to Make It:
- For this project, we are using a knit blanket we picked up at a local home decor store
- In the Sawgrass Print Utility, we chose Natural Fabrics for the product. Even though this is a synthetic knit, we are using the VersiFlex Light paper, so natural fabric is the better choice.
- We printed this on 8.5″x11″ VersiFlex Light paper.
How to Press It:
- Turn on your press on and set the temperature to 375F (191C) degrees
- If you see any dust, lint roll your print area to make sure your surface is clean.
- Place your fabrfic on the press and line the paper up on top as you place it on the product.
- Cover with blow out paper.
- Press the fabric for 30 seconds at VERY HIGH pressure.
- When finished, remove the fabric from the press and peel the paper off as quickly as possible.
Tips & Tricks:
- With the VersiFlex System, your product setting for fabric in the Sawgrass Print Utility depends on whether the fabric is polyester based. If it is not over 80% polyester, choose natural fabrics as your product type and use your VersiFlex Light paper.
- This blanket has a fringe. We would suggest positioning your blanket in the press to have that hang over the edge. Why? Fringe may not take the heat as well as the solid fabric. It could also create an uneven surface in the press and impact the quality of the result.
Tools and Supplies to Make it:
- Sawgrass SG500 or SG1000 Printer
- Sawgrass VersiFlex Inks
- VersiFlex Light Paper
- Flat Heat Press
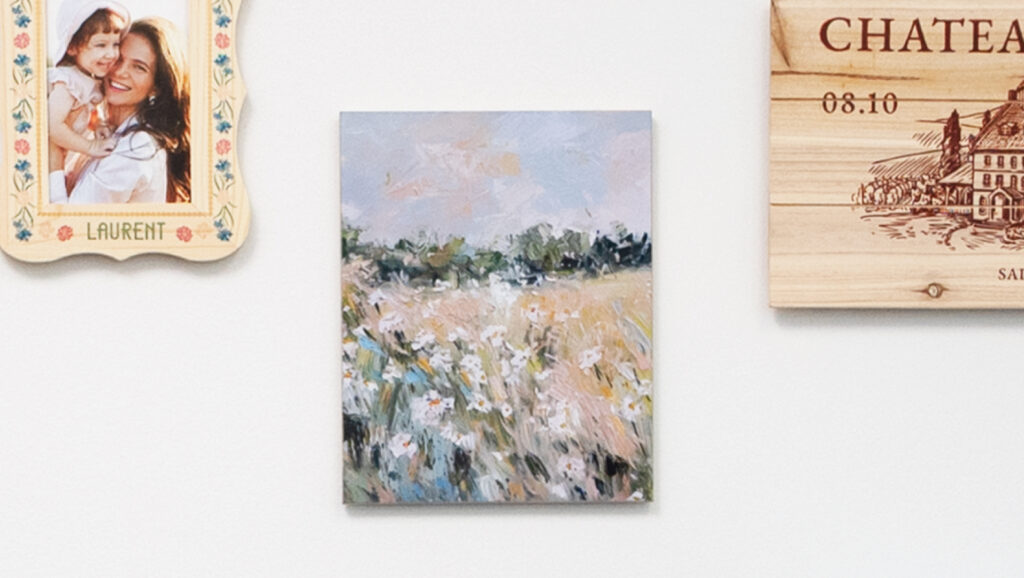
- Canvas Fabric
How to Make It:
- For this project, we are using canvas fabric we purchased at a local craft store
- In the Sawgrass Print Utility, we chose Natural Fabrics for the product.
- We printed this on 11″x17″ VersiFlex Light paper.
How to Press It:
- Turn on your press on and set the temperature to 375F (191C) degrees
- If you see any dust, lint roll your print area to make sure your surface is clean.
- Place your fabric on the press and line the paper up on top as you place it on the product.
- Cover with blow out paper.
- Press the fabric for 30 seconds at VERY HIGH pressure.
- When finished, remove the fabric from the press and peel the paper off as quickly as possible.
Tips & Tricks:
- Canvas Prints are a great way to display photos or artwork. They can be finished by stretching the canvas or by adding them to a frame with or without the glass!
- Peeling the VersiFlex Light paper off of a product does have a different feel. It does need to be a hot peel. While there is definitely a pulling feel to it, if it is too difficult to pull, increase your pressure or temperature.
Tools and Supplies to Make it:
- Sawgrass SG500 or SG1000 Printer
- Sawgrass VersiFlex Inks
- VersiFlex Light Paper
- Flat Heat Press
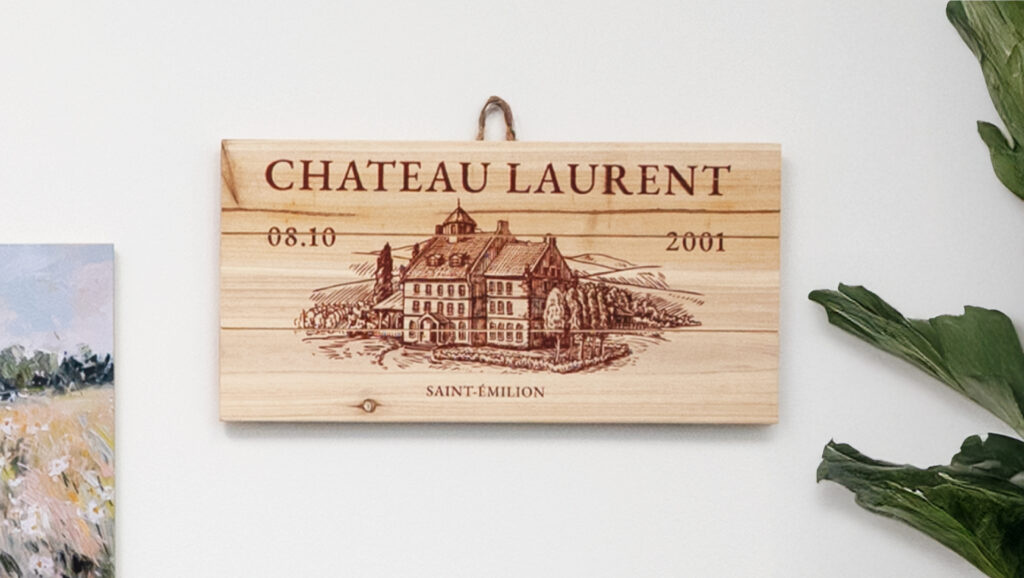
- Wooden Sign
How to Make It:
- For this project, we are using a wooden sign we picked up at a local craft store
- In the Sawgrass Print Utility, we chose Uncoated Wood for the product.
- We printed this on 11″x17″ VersiFlex Light paper
How to Press It:
- Turn on your press on and set the temperature to 375F (191C) degrees
- Place your sign on the press and line the paper up on top as you place it on the product.
- Cover with blow out paper.
- Press the wood for 30 seconds at medium pressure.
- When finished, remove the coaster from the press and peel the paper off as quickly as possible.
Tips & Tricks:
- Because you do need to remove the paper from the product as quickly as possible after pressing, it is a good idea to have a paper tab that you can use when pulling the paper off. If your design does not completely cover the product, you can pinch an edge before pressing to give you something to quickly grab.
- This is another style of product where you can alter the size of the design to fit your printer and press. The only thing that changes is how much of the product is covered by the design.
Tools and Supplies to Make it:
- Sawgrass SG500 or SG1000 Printer
- Sawgrass VersiFlex Inks
- VersiFlex Light Paper
- Flat Heat Press
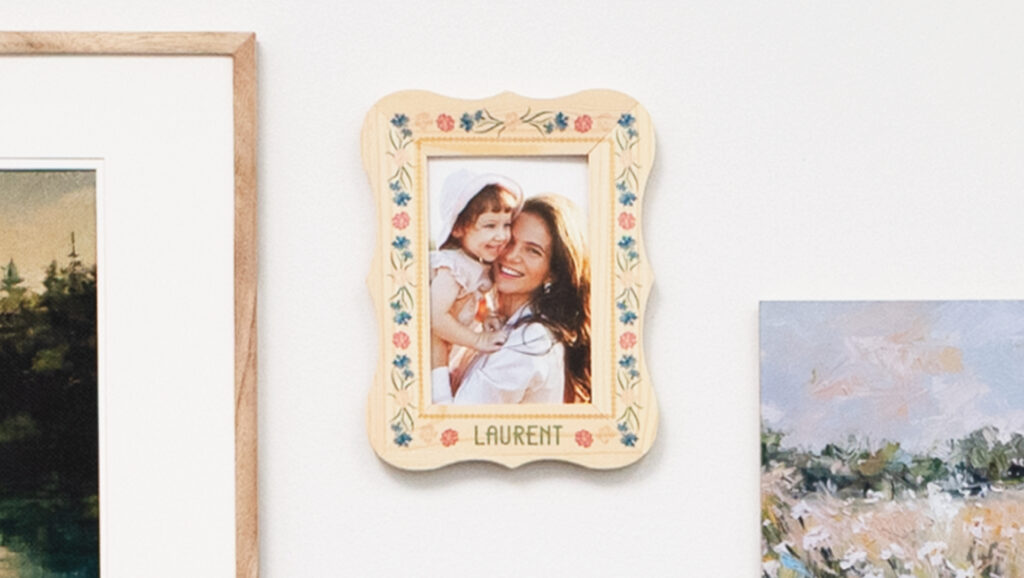
- Uncoated Wood Frame
How to Make It:
- For this project, we are using a wooden frame we picked up at a local craft store
- In the Sawgrass Print Utility, we chose Uncoated Wood for the product.
- We printed this on 11″x17″ VersiFlex Light paper
How to Press It:
- Turn on your press on and set the temperature to 375F (191C) degrees
- Place your frame on the press and line the paper up on top as you place it on the product.
- Cover with blow out paper.
- Press the wood for 30 seconds at medium pressure.
- When finished, remove the frame from the press and peel the paper off as quickly as possible.
Tips & Tricks:
- Because you do need to remove the paper from the product as quickly as possible after pressing, it is a good idea to have a paper tab that you can use when pulling the paper off. If your design does not completely cover the product, you can pinch an edge before pressing to give you something to quickly grab.
- Looking for design inspiration? This project works well with the graphic elements or background patterns in the MySawgrass design tool. Just measure your frame and create a custom canvas. Want to make sure you do not design into the open middle area of the frame? Measure it and then go to shapes and add a rectangle of those dimensions.
Tools and Supplies to Make it:
- Sawgrass SG500 or SG1000 Printer
- Sawgrass VersiFlex Inks
- TruPix Classic Paper
- Flat Heat Press
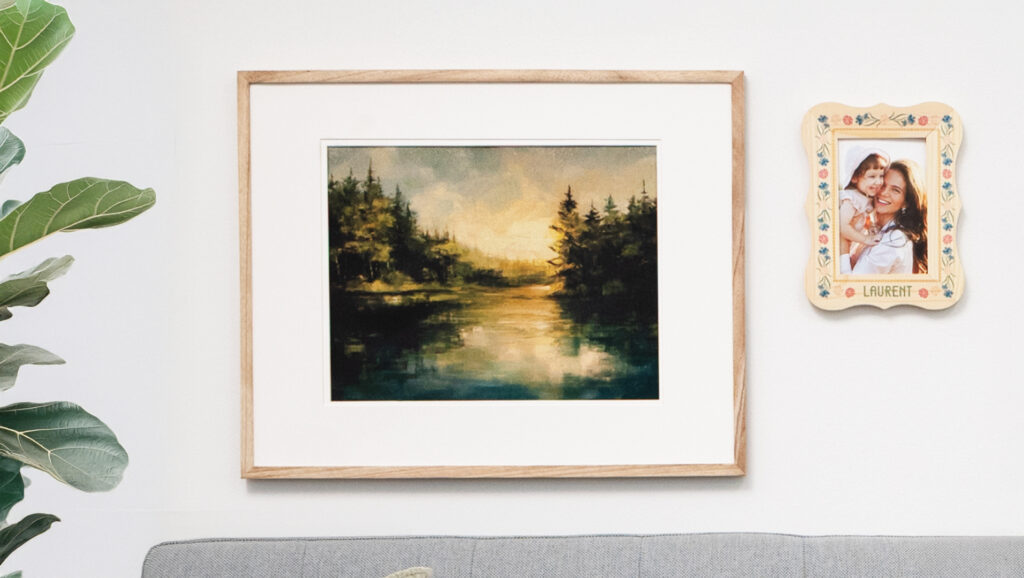
- Hardboard Photo Panel
How to Make It:
- For this project, we are using a sublimation hardboard panel
- In the Sawgrass Print Utility, we chose MDF Board for the product.
- We printed this on “8.5×11” TruePix Paper
How to Press It:
- Turn on your press on and set the temperature to 400F (191C) degrees
- Place your panel on the press and line the paper up on top as you place it on the product.
- Cover with blow out paper.
- Press the panel for 60 seconds at medium pressure.
- When finished, remove the panel from the press and remove the sublimation transfer paper.
Tips & Tricks:
- Your panel may have a protective plastic cover on the product that will need to be peeled off before pressing. You can use denatured alcohol on a lint free cloth to remove any dust before pressing.
- Looking for design inspiration? While these panels work great with photos or artwork, you can also add one of the inspirational quotes found in Designs in the MySawgrass design tool.