
Skill Level: Intermediate

Tools & Supplies to Make It:
- MySawgrass+ Membership
- Sawgrass SG500 or SG1000 Printer
- Sawgrass Sublijet UHD Inks
- TruePix paper
- Tumbler Press
- 8.5″x11” or larger sublimation paper
- 20oz UV Color Changing Skinny Tumbler
- Heat Tape
How to Create It:
- Log into MySawgrass and from the Landing Page choose Design.
- For your product, select the 20oz UV Color Changing Skinny Tumbler by opening the Drinkware category or by using the search bar.
- Once the design tool opens, click on DESIGNS and then use the filter function to choose the category EASTER.
- Choose the Cottontail’s Skinny Tumbler Design.
- This design is designed specifically for a skinny tumbler, so you should not have to adjust the sizing of the design.
- If you would like to change the text, click on each line and then alter it in the text box in the left panel.
- Once the design is in place, hit the Print button and then on the Print Screen click on Print File.
How to Print It:
- You should get a popup that asks if you want to open Sawgrass Print Utility. You will need to click Open Sawgrass Print Utility. If you are not seeing this, you’ll need to disable your popup blocker.
- In Sawgrass Print Utility, start by scrolling down and making sure your print orientation is set to Landscape.
- Set your print preset to Stainless Steel Drinkware.
- Make sure that the media size and type match what you have in the printer. On the Color Management Tab, we suggest having the Color Mode set to Vivid.
- When you’ve confirmed all of your settings, Hit Print.
How to Press It:
- Turn on your tumbler press on and set the temperature to 380F degrees
- Place the tumbler face-down on the paper and secure it with heat-resistant tape.
- Open the tumbler press and slide in your drinkware.
- Press the tumbler for 45 seconds, open press, rotate tumbler and press for another 45 seconds.
- When finished, remove the tumbler.
Tips and Tricks:
- We pressed this onto a tumbler that changes colors in the sun. The background pattern would be white and pink, but in the sun would change to blue and pink. If you do not have a color changing tumbler, you can add a solid background of pastel blue for a similar look.
- For a tumbler with a design that covers the entire product, press for 45 seconds, then rotate the product and press for another 45 seconds to get even coverage. Since this is a longer time than recommended, we did lower the press temperature.
Tools and Supplies to Make it:
- Sawgrass SG500 or SG1000 Printer
- Sawgrass VersiFlex Inks
- VersiFlex Light Paper
- Flat Heat Press
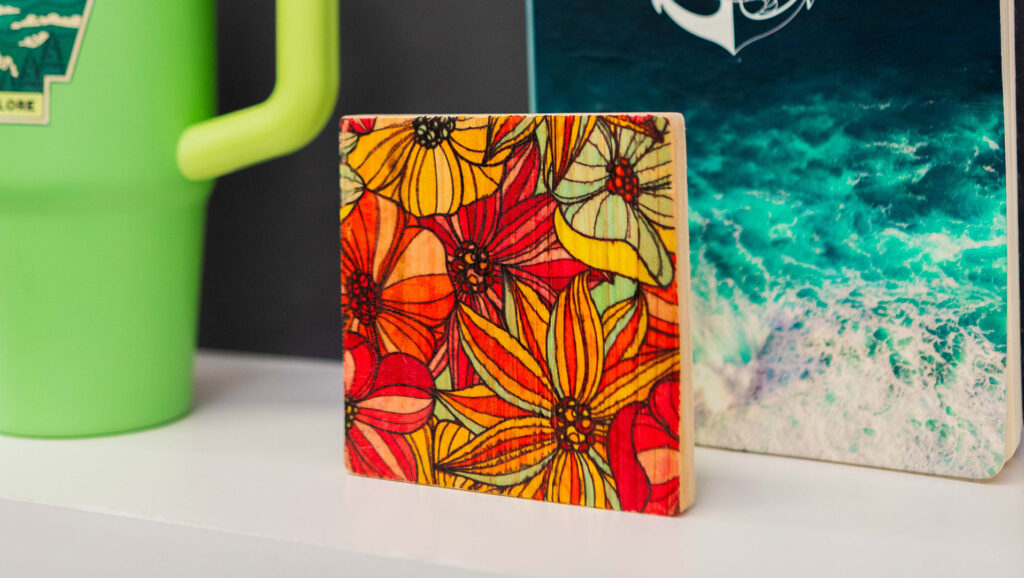
- Wood Coaster
How to Make It:
- For this project, we are using a wood coaster we picked up at a local craft store
- In the Sawgrass Print Utility, we chose Uncoated Wood for the product.
- We printed this on 8.5″x11″ VersiFlex Light paper
How to Press It:
- Turn on your press on and set the temperature to 375F (191C) degrees
- Place your coaster on the press and line the paper up on top as you place it on the product.
- Cover with blow out paper.
- Press the wood for 30 seconds at medium low pressure.
- When finished, remove the coaster from the press and peel the paper off as quickly as possible.
Tips & Tricks:
- Because you do need to remove the paper from the product as quickly as possible after pressing, it is a good idea to have a paper tab that you can use when pulling the paper off. If your design does not completely cover the product, you can pinch an edge before pressing to give you something to quickly grab.
- With both uncoated wood and unglazed ceramic, we do not recommend attempting to do a double-sided design. The blowout paper will stick to the side that was originally pressed.
Tools and Supplies to Make it:
- Sawgrass SG500 or SG1000 Printer
- Sawgrass VersiFlex Inks
- Sublimation Heat Transfer Vinyl
- Tumbler Press
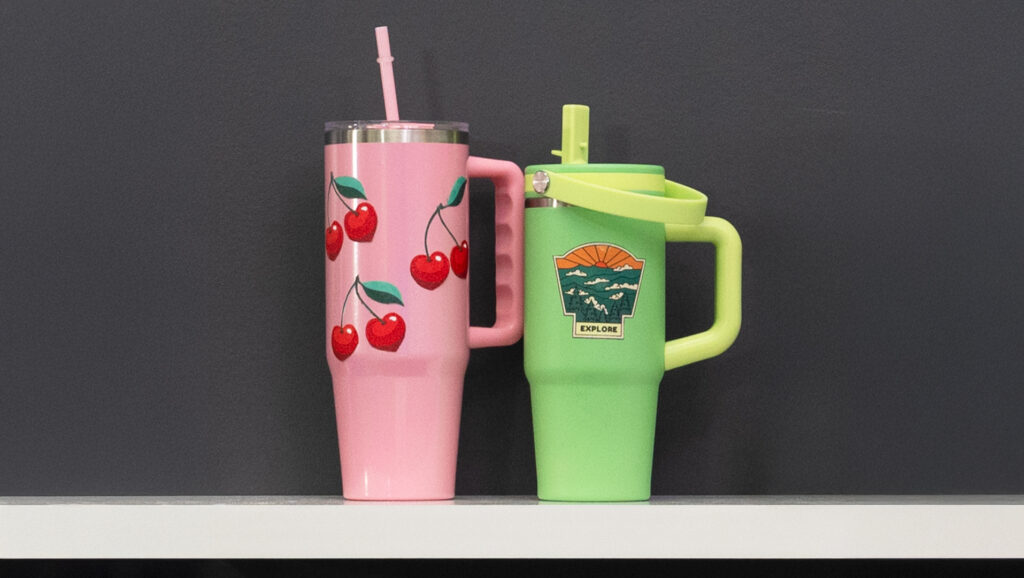
- Tumblers
How to Make It:
- For this project, we are using tumblers we picked up at a local craft store
- In the Sawgrass Print Utility, we chose Sublimation Heat Transfer Vinyl for the product.
- We printed this on Siser Easy Subli HTV
How to Press It:
- Turn on your press on and set the temperature to 311F (155C) degrees
- Once you have printed your design, place it in the heated press for 60 seconds. This is often referred to as curing the print.
- Remove design from press and cut using your Cutter Software.
- Once design is cut, remove it from the backing sheet and place on your product
- Press the tumbler for 15 seconds at Medium pressure.
- When finished, remove the tumbler from the press.
Tips & Tricks:
- Sublimation Heat Transfer Vinyl designs can be set up in design tool of your cutter and then sent to the Sawgrass Print Utility by selecting Send to Sawgrass Print Utility as your printer name.
- Two quick tips to make sure the cutter sees the Registration marks on a print and cut project: When placing the vinyl on the cutting mat, make sure it is flush with the corner and are right on top of the edge lines on the mat. Also, if your cutter has a lid, close it before cutting. This helps the cutter read the lines without interference from overhead lights.
Tools & Supplies to Make It:
- Sawgrass SG1000 Printer
- Sawgrass VersiFlex Inks
- TruePix paper
- Flat Heat Press
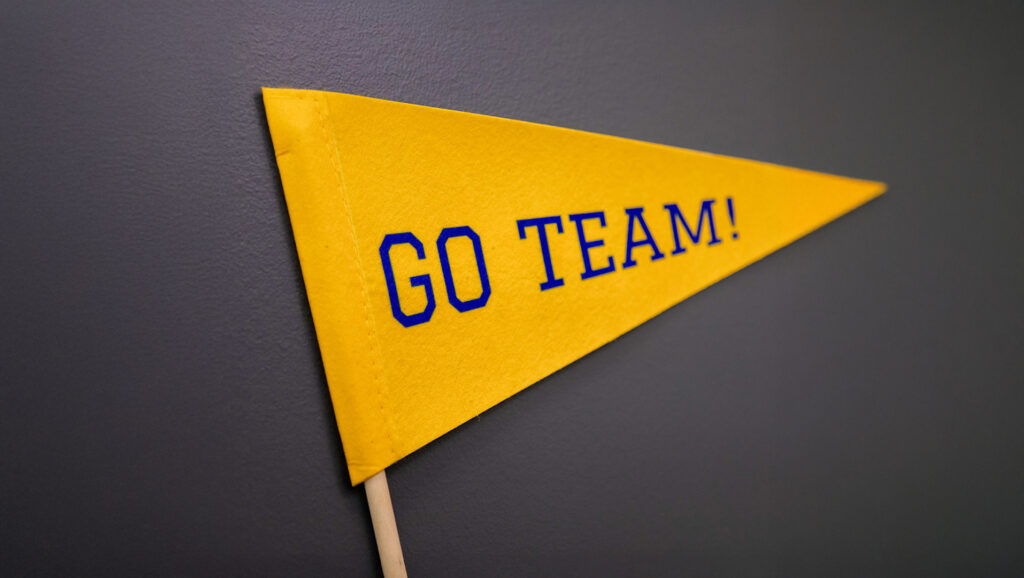
- Felt Banner
- Heat Tape
How to Make It:
- For this project, we are using a sublimation blank
- In the Sawgrass Print Utility we chose Polyester for the product.
- We printed this on 11×17 Truepix paper
How to Press It:
- Turn on your press on and set the temperature to 375F (191C) degrees
- If you see any dust, lint roll your print area to make sure your surface is clean.
- Lay your felt banner facedown on to the printout and secure with heat-resistant tape.
- Press the felt for 60 seconds at medium pressure.
- When finished, remove the banner.
Tips & Tricks:
- Because of the size of this project, the key to avoiding the lines you sometimes get when pressing polyester is to leave the paper bigger than the product; by taping the product to the larger paper, you’ll not see those lines.
- If you are setting this up in the MySawgrass Design Tool, you can use a custom canvas and then the triangle shape from Shapes in Elements to build your product.

Tools & Supplies to Make It:
- Sawgrass SG500 or SG1000 Printer
- Sawgrass VersiFlex Inks
- TruePix paper
- Flat Heat Press
- Fabric Sublimation Notebook
- Heat Tape
How to Make It:
- For this project, we are using a sublimation blank
- In the Sawgrass Print Utility we chose Polyester for the product since it has a fabric cover
- We printed this on 8.5 x 11 Truepix paper
How to Press It:
- Turn on your press on and set the temperature to 375F (191C) degrees
- If you see any dust, lint roll your print area to make sure your surface is clean.
- Lay your notebook facedown on to the printout and secure with heat-resistant tape.
- Press the notebook for 50 seconds at medium pressure.
- When finished, remove the notebook.
Tips & Tricks:
- While you can use VersiFlex Light on a leather journal or cloth covered notebook, this journal is a sublimation blank we picked up at one of our wonderful dealers.
- To prevent warping, when you remove this item from the press, place it under something heavy while it cools to keep it flat.
Tools and Supplies to Make it:
- Sawgrass SG500 or SG1000 Printer
- Sawgrass VersiFlex Inks
- VersiFlex Light Paper
- Flat Heat Press
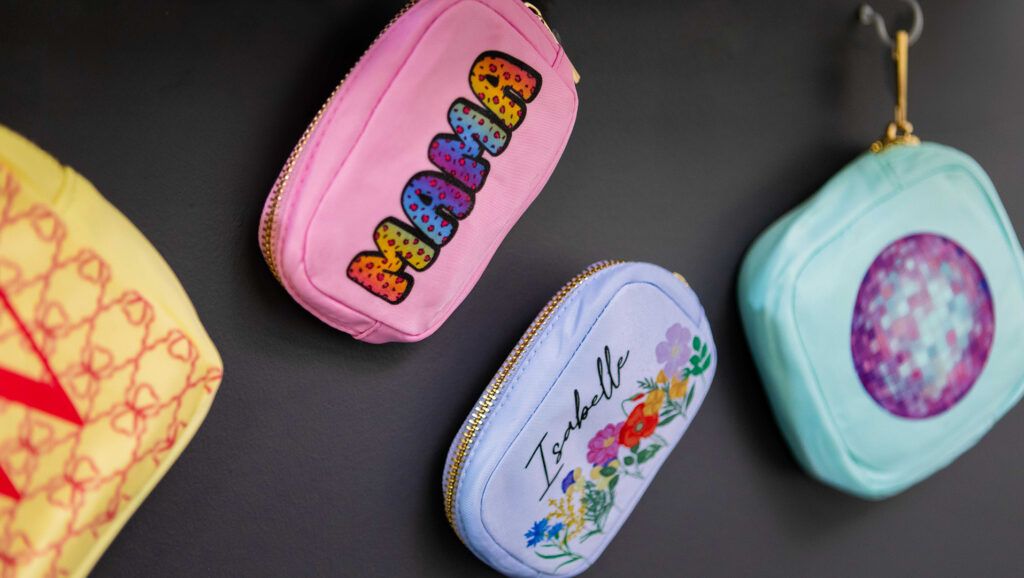
- Nylon Zipper Pouch
- Heat Tape
How to Make It:
- For this project, we are using a nylon pouch we picked up at a local craft store
- In the Sawgrass Print Utility, because this is a textile and we know it needs the VersiFlex paper, we chose Natural Fabrics for the product.
- We printed this on 8.5×11 VersiFlex Light paper
How to Press It:
- Turn on your press on and set the temperature to 375F degrees
- If you see any dust, lint roll your print area to make sure your surface is clean.
- Place your pouch on the press and line the paper up on top as you place it on the product.
- Cover with blow out paper.
- Press the pouch for 45 seconds at HIGH pressure.
- When finished, remove the pouch from the press and peel the paper off as quickly as possible.
Tips & Tricks:
- Because this is not a flat product, and it has a zipper, we recommend filling it with something flat, like a pressing pillow, before pressing. Since the pressing time is short, you can fill it with cardboard or foam as well.
- VersiFlex Light Projects needs to get pressed onto the product as quickly as possible. You could do two or three of these on the same page and then get to the press quickly. Have your nylon pouches flat and ready to go before printing to speed up the process.
Tools and Supplies to Make it:
- Sawgrass SG500 or SG1000 Printer
- Sawgrass VersiFlex Inks
- VersiFlex Light Paper
- Flat Heat Press
- Cross Stitch Fabric
How to Make It:
- For this project, we are using cross stitch fabric we picked up at a local craft store
- In the Sawgrass Print Utility, we chose Natural Fabrics for the product.
- We printed this on 8.5×11 VersiFlex Light paper, but you can use larger paper for a larger design
How to Press It:
- Turn on your press on and set the temperature to 375F (191C) degrees
- If you see any dust, lint roll your print area to make sure your surface is clean.
- Place your fabric on the press and line the paper up on top as you place it on the product.
- Cover with blow out paper.
- Press the fabric for 45 seconds at VERY HIGH pressure.
- When finished, remove the fabric from the press and peel the paper off as quickly as possible.
Tips & Tricks:
- With cotton fabric, pressure and temperature are very important. Use a heat gun to check the temperature of your press. For a smooth result, have the pressure on your press as high as possible.
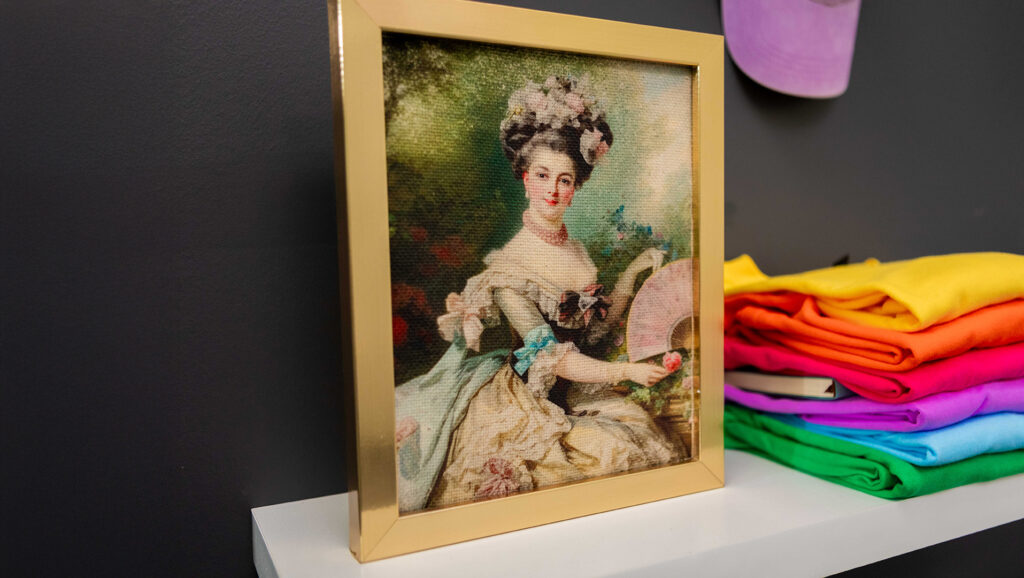
- This image is from the MySawgrass design tool. They are in both the Graphic Elements and are used in Designs as well.
Tools and Supplies to Make it:
- Sawgrass SG500 or SG1000 Printer
- Sawgrass VersiFlex Inks
- VersiFlex Light Paper
- Flat Heat Press
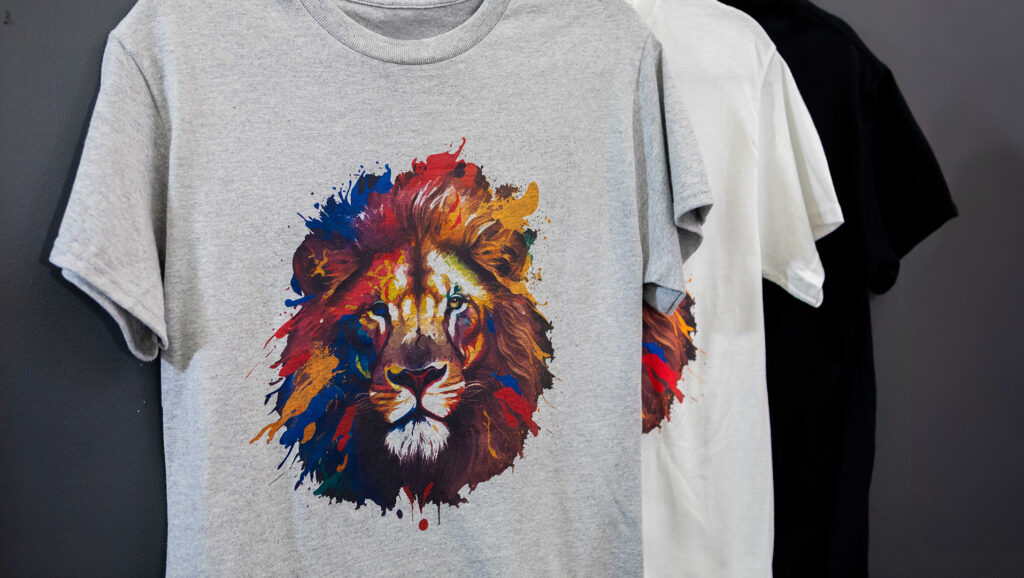
- Cotton T-shirt
How to Make It:
- For this project, we are using a cotton t-shirt we picked up at a local craft store
- In the Sawgrass Print Utility, we chose Natural Fabrics for the product.
- We printed this on 8.5×11 VersiFlex Light paper, but you can use larger paper for a larger design
How to Press It:
- Turn on your press on and set the temperature to 375F (191C) degrees
- If you see any dust, lint roll your print area to make sure your surface is clean.
- Place your shirt on the press and line the paper up on top as you place it on the product.
- Cover with blow out paper.
- Press the shirt for 45 seconds at VERY HIGH pressure.
- When finished, remove the shirt from the press and peel the paper off as quickly as possible.
Tips & Tricks:
- With cotton fabric, pressure and temperature are very important. Use a heat gun to check the temperature of your press. For a smooth result, have the pressure on your press as high as possible.
- We recommend a quick pre-press to get out any wrinkles. You can also do a quick finish press by removing the paper, covering your design with blowout or parchment paper, and then doing a quick second press at a lower pressure.

Almost every area of the Create Your Design panel has a search feature of some type. This will allow you to search that area for specific content.
Let’s look at some ways to make the most of your search and to find what you’re looking for as quickly as possible. If you want to follow along, we’re using an lloz Ceramic Mug and are in the Graphics Library under Elements.

One feature that will speed up your search is the filter feature.
When you click on the funnel, you’ll see the following options:
- Subscription Type
- Collection
Subscription type is helpful if you are wanting to only see artwork that is free or that is upgraded MySawgrass+ content. This content can be recognized by the Diamond Icon you’ll see on it.
Collection is helpful if you’re looking for art from a specific category or style. One very helpful thing to do is to choose multiple categories. For instance, a spring design may benefit from artwork under Spring, Spring Watercolor, Gnomes, or Gardening. This type of search narrows things down, but still gives you a wide range of artwork to choose from.

Tips for a successful search:
- Start with specific keywords that describe the artwork you’re looking for. For example, instead of just searching for “nature,” try more specific terms like “forest,” “mountains,” or “wildlife.”
- Include details about the style (e.g., “minimalist landscape,” “vintage typography”) if you’re looking for a specific aesthetic.
- If you’re not seeing the results you expected, try similar words. For instance, “automobiles” and “cars” could bring back very different results. Even a variant like “autos” could show you something different. It all depends on wording was used as a tag for the artwork.

One area that is slight different is the font search:
- Under the filter, the collections you’ll see are various font types. You can narrow your search by looking specifically at serif (fonts with “feet”) or sans serif (straight with no “feet”). fonts. You’ll also see options like block or script as options.
- In the search itself, you are not limited to font names like you were in our previous platforms. Fonts are tagged as well, so a search for “kid” will result in more childlike fonts. You can even search by decades if you’re doing artwork that has a vintage vibe.
Thanks for following along with us. We hope these tips help you find the elements and artwork you need for the project. Still have questions? Our Care Team will be glad to assist you at care.sawgrassink.com. Please check out all of our educational content and offerings under the Learn menu at sawgrassink.com!
Skill Level: Intermediate
Tools & Supplies to Make It:
- MySawgrass+ Membership
- Sawgrass SG1000 Printer
- Sawgrass Sublijet UHD Inks
- TruePix paper
- Convection Oven
- 11”x17” sublimation paper
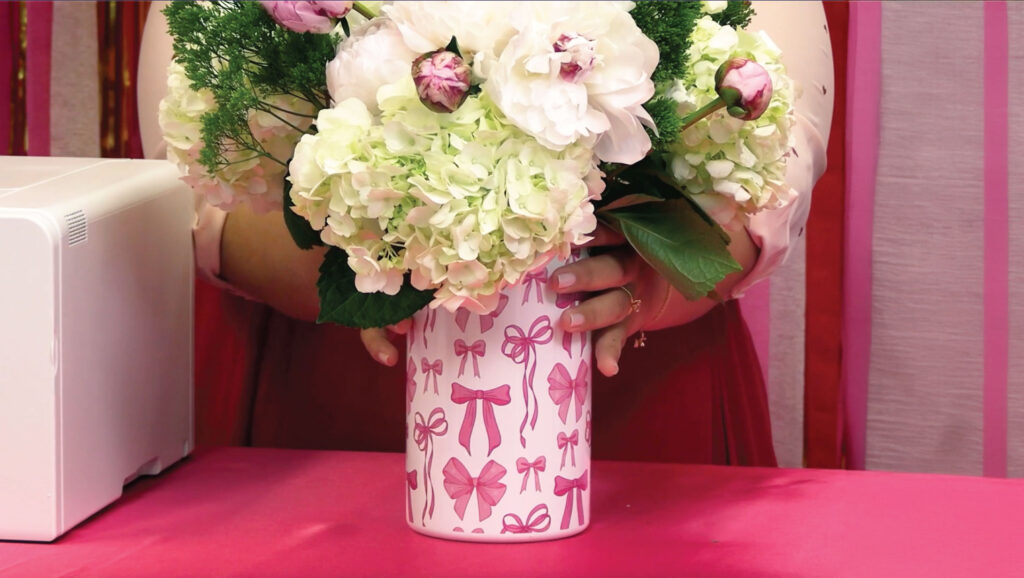
- Stainless Steel Wine Chiller
- Heat Tape
How to Create It:
- Log into MySawgrass and from the Landing Page choose Design.
- For your product, select the Stainless Steel Wine Chiller by opening the Kitchen & Dining category or by using the search bar.
- Once the design tool opens, click on ELEMENTS and then BACKGROUNDS.
- Click on PATTERNS panel of the design tool and search for Ribbon to choose the Pink Ribbon pattern.
- Click on DONE to add it to your product.
- Use the SIZE slider to adjust the pattern size.
- Once the design is in place, hit the Print button and then on the Print Screen click on Print File.
How to Print It:
- You should get a popup that asks if you want to open Sawgrass Print Utility. You will need to click Open Sawgrass Print Utility. If you are not seeing this, you’ll need to disable your popup blocker.
- In Sawgrass Print Utility, start by scrolling down and making sure your print orientation is set to Landscape.
- Set your print preset to Stainless Steel Drinkware.
- Make sure that the media size and type match what you have in the printer. On the Color Management Tab, we suggest having the Color Mode set to Vibrant.
- When you’ve confirmed all of your settings, Hit Print.
How to Press It:
- Turn on your press on and set the temperature to 325F degrees
- Cut any excess paper away, wrap your design around wine chiller, and secure with heat tape.
- Wrap your product in shrink wrap.
- Place the wine tumbler in the oven 12 minutes.
- Rotate product half way through the time.
- When finished, remove the shrinkwrap and paper as quickly as possible.
Tips and Tricks:
- You do not have to use a heat gun and shrink the wrapper before inserting it in the oven. The oven will quickly do that step for you.
- Shrink Wrap is hard to remove once it has cooled. If it hardens before you are done, use a heat gun to warm it slightly and then remove the remaining wrap.