
Follow along as Ivy shows us how to make a one-of-a-kind gift for your furry friend!
Skill Level: Beginner
TOOLS & SUPPLIES TO MAKE IT:
- MySawgrass+ Membership
- Sawgrass SG500 or SG1000 Printer
- Sawgrass Sublijet UHD Inks
- TruePix paper
- Flat Press
- 8.5”x11” or larger sublimation paper
- Pet Scarf
- Heat Tape
HOW TO CREATE IT:
- Log into MySawgrass and from the Landing Page choose Design.
- For your product, select the Pet Scarf by opening the Pet category or by using the search bar.
- There are three sizes of pet scarfs, so choose the one that matches your template.
- Once the design tool opens, you can add your design.
- Open the DESIGNS panel of the design tool and select the Hand Drawn Heart design. You can find the design in the Valentine’s Day category or by searching directly using the search bar.
- This design was made specifically for the pet scarf, so once you click, it should fill the artboard seamlessly.
- Customize the name by clicking the text field and editing using the text panel.
- Once the design is in place, hit the Print button and then on the Print Screen click on Print File.
HOW TO PRINT IT:
- You should get a popup that asks if you want to open Sawgrass Print Utility. You will need to click Open Sawgrass Print Utility. If you are not seeing this, you’ll need to disable your popup blocker.
- In Sawgrass Print Utility, start by scrolling down and making sure your print orientation is set to Landscape.
- Even though this material is leather, for this project, you can use the preset for Polyester T-Shirt.
- Make sure that the media size and type match what you have in the printer. On the Color Management Tab, we suggest having the Color Mode set to Vibrant.
- When you’ve confirmed all of your settings, Hit Print.
HOW TO PRESS IT:
- Turn on your press on and set the temperature to 385F degrees
- If you see any dust, lint roll your print area to make sure your surface is clean.
- Lay your pet scarf facedown on to the printout and secure with heat-resistant tape.
- Press the pet scarf for 45 seconds at medium pressure.
- When finished, remove the scarf.
Tips & Tricks:
- Because of the size of this project, the key to avoiding the lines you sometimes get when pressing polyester is to leave the paper bigger than the product, By taping the product to the larger paper, you’ll not see those lines.
- Want to make sure that the product you have matches the template size? To see the size of the template, click the “I” next to the product name and you’ll see the product dimensions.
Follow along as Ivy shows us how to make this awesome gift for a teacher!
Skill Level: Beginner
Tools & Supplies to Make It:
- MySawgrass+ Membership
- Sawgrass SG500 or SG1000 Printer
- Sawgrass Sublijet UHD Inks
- TruePix paper
- Mug or Tumbler Press
- 8.5”x11” or larger sublimation paper
- Frosted Glass Mug
- Heat Tape
How to Create It:
- Log into MySawgrass and from the Landing Page choose Design.
- For your product, select the 11oz Frosted Glass Mug by opening the Drinkware category or by using the search bar.
- Once the design tool opens, you can add your design.
- Open the DESIGNS panel of the design tool and select the Hand drawn Heart Mug design. You can find the design in the Valentine’s Day category or by searching directly using the search bar.
- This design was made specifically for the mug, so once you click, it should fill the artboard seamlessly. If it does not, you can resize and place each element of the design using the resize and move handles.
- Customize the initial by clicking the text field and editing using the text panel.
- Once the design is in place, hit the Print button and then on the Print Screen click on Print File.
How to Print It:
- You should get a popup that asks if you want to open Sawgrass Print Utility. You will need to click Open Sawgrass Print Utility. If you are not seeing this, you’ll need to disable your popup blocker.
- In Sawgrass Print Utility, start by scrolling down and making sure your print orientation is set to Landscape.
- Even though this material is leather, for this project, you can use the preset for Frosted Glass.
- Make sure that the media size and type match what you have in the printer. On the Color Management Tab, we suggest having the Color Mode set to Vibrant.
- When you’ve confirmed all of your settings, Hit Print.
How to Press It:
- Turn on your press on and set the temperature to 360F degrees
- If you see any dust, use denatured alcohol and a lint free cloth on your print area to make sure your surface is clean.
- Wrap your design around the mug and secure with heat-resistant tape.
- Press the mug for 4.5 minutes at medium pressure
- When finished, remove the mug.
Tips & Tricks:
- The frosted glass preset may not select the choices you are expecting, but they are the best ones to give you great output on the frosted glass!
- Mugs are also great vessels for other gifts, You can make this extra special by placing a bag of candy or other treats in the mug before gifting!
Follow along as Ivy shows us how to make these adorable coasters!
Skill Level: Intermediate
Tools & Supplies to Make It:
- MySawgrass+ Membership
- Sawgrass SG500 or SG1000 Printer
- Sawgrass Sublijet UHD Inks
- TruePix paper
- Flat Press
- 8.5”x11” or larger sublimation paper
- Hardboard Heart Shape Coaster
- Heat Tape
How to Create It:
- Log into MySawgrass and from the Landing Page choose Design.
- For your product, select the Hardboard Heart Shape Coaster by opening the Kitchen & Dining category or by using the search bar.
- Once the design tool opens, you can add your design.
- Open the DESIGNS panel of the design tool and select one of the Conversation Heart designs. You can find the design in the Valentine’s Day category or by searching directly using the search bar.
- This design was made specifically for the coaster, so once you click, it should fill the artboard seamlessly.
- If you’d like to customize the text, click the text field and edit using the text panel.
- Once the design is in place, hit the Print button and then on the Print Screen click on Print File.
How to Print It:
- You should get a popup that asks if you want to open Sawgrass Print Utility. You will need to click Open Sawgrass Print Utility. If you are not seeing this, you’ll need to disable your popup blocker.
- In Sawgrass Print Utility, start by scrolling down and making sure your print orientation is set to Landscape.
- Use the preset for MDF Coaster.
- Make sure that the media size and type match what you have in the printer. On the Color Management Tab, we suggest having the Color Mode set to Vibrant.
- If you are doing multiple coasters, send each of them to the Sawgrass Print Utility.
- At the top of the design files panel, choose each project name from the Select a Job pulldown and then click the Merge Into Tab button. This will put them all on one page.
- You can adjust your spacing to add room around each coaster.
- When you’ve confirmed all of your settings, Hit Print.
How to Press It:
- Turn on your press on and set the temperature to 400F degrees
- If you see any dust, use denatured alcohol and a lint free cloth to make sure your surface is clean.
- Lay your coaster facedown on to the printout and secure with heat-resistant tape.
- Press the coaster for 40 to 60 seconds at medium pressure
- When finished, remove the coaster.
Tips & Tricks:
- Using the merge tab feature and putting multiple projects on one page is a great way to save paper. You can design the jobs one by one and then let the Sawgrass Print Utility do the work.
- By clicking on the heart design in the MySawgrass design tool, you are able to see the colors used and change them. This is another great way to make your project unique even when using pre-made designs!
Follow along in English or Spanish as Judith makes this sentimental gift!
English
Spanish
Skill Level: Intermediate
TOOLS & SUPPLIES TO MAKE IT:
- MySawgrass+ Membership
- Sawgrass SG500 or SG1000 Printer
- Sawgrass Sublijet UHD Inks
- TruePix paper
- Flat Press
- 8.5”x11” or larger sublimation paper
- 4″ x 6″ Acrylic Award
- Heat Tape
HOW TO CREATE IT:
- Log into MySawgrass and from the Landing Page choose Design.
- For your product, select the 4″ x 6″ Acrylic Award by opening the Home Decor category or using the search bar.
- On the bottom bar, make sure that the direction of the product is set to PORTRAIT.
- Open the DESIGNS panel of the design tool and select the Song_Player Frame design. You can find the design in the PHOTO FRAMES category or by searching directly using the search bar.
- Click on the gray photo box and then on the left side choose REPLACE IMAGE to add your favorite photo.
- Add your song title by clicking the text field and editing using the text panel.
- When your design is finished, hit the Print button and then on the Print Screen click on Print File.
HOW TO PRINT IT:
- You should get a popup that asks if you want to open Sawgrass Print Utility. You will need to click Open Sawgrass Print Utility. If you are not seeing this, you’ll need to disable your popup blocker.
- In Sawgrass Print Utility, start by scrolling down and making sure your print orientation is set to PORTRAIT.
- For this project, you can use the preset for ACRYLIC SIGN.
- If you do not use a preset, and do your settings manually, make sure that Mirror is OFF.
- Make sure that the media size and type match what you have in the printer.
- On the Color Management Tab, we suggest having the Color Mode set to Vibrant.
- When you’ve confirmed all of your settings, Hit Print.
HOW TO PRESS IT;
- Turn on your press on and set the temperature to 385F degrees
- Lay your acrylic facedown on to the printout and secure with heat-resistant tape.
- Press the acrylic award for 225 seconds at medium pressure
- When finished, remove the award.
TIPS & TRICKS:
- You can go to Spotify and create a code that can be downloaded. If you do, just delete the bottom portion of the design and upload your code.
- With Acrylic and glass products, make sure you do not mirror the design. These are printed onto the back of the product and viewed from the front
- A silicone pad comes in handy with slate, glass, and acrylic. They help to cushion the product and protect it from the lid of the press. For slate, it helps get the print into the uneven surface.
Follow along in English or Spanish as Judith makes this pillow!
English
Spanish
Skill Level: Beginner
Tools & Supplies to Make It:
- MySawgrass+ Membership
- Sawgrass SG1000 Printer
- Sawgrass Sublijet UHD Inks
- TruePix paper
- Flat Press
- 11″x17″ (Tabloid) Paper
- Sequin Heart Pillow
- Heat Tape
How To Create it:
- Log into MySawgrass and from the Landing Page choose Design.
- For your product, select the Heart Shaped Flip Sequin Pillow Cover by opening the Home Decor category or using the search bar.
- Once the design tool opens, you can add your design.
- Open the DESIGNS panel of the design tool and select the HEART ICING PILLOW design. You can find the design in the VALENTINE’S DAY category or by searching directly using the search bar.
- Youustomize the text by clicking the text field and editing using the text panel.
- When your design is finished, hit the Print button and then on the Print Screen click on Print File.
How To Print It:
- You should get a popup that asks if you want to open Sawgrass Print Utility. You will need to click Open Sawgrass Print Utility. If you are not seeing this, you’ll need to disable your popup blocker.
- In Sawgrass Print Utility, start by scrolling down and making sure your print orientation is set to Landscape.
- For this project, you can use the preset for Metal KeyChain.
- Make sure that the media size and type match what you have in the printer.
- On the Color Management Tab, we suggest having the Color Mode set to Vibrant.
- When you’ve confirmed all of your settings, Hit Print.
How to Press It:
- Turn on your press on and set the temperature to 385F degrees.
- Check to make sure that all the sequins have the white side facing up.
- Place the pillow face-down on the paper and secure it with heat-resistant tape.
- Make sure you lay the pillow on the heat press flat to prevent wrinkles.
- Cover with blowout paper.
- Press the stocking for 60 seconds at medium pressure
- When finished, remove the pillow.
Tips and Tricks:
- If you have an SG500, or have an SG1000 but no tabloid size paper, size the design to fit on the paper you have. You’ll have more white sequins, but will still have an adorable pillow!
- There are many ways to alter the text on this project and make it your own. You can do initials, include an inside joke, or a famous quote about love.
- Flip the sequins back and forth shortly after pressing to make sure none of them stick.
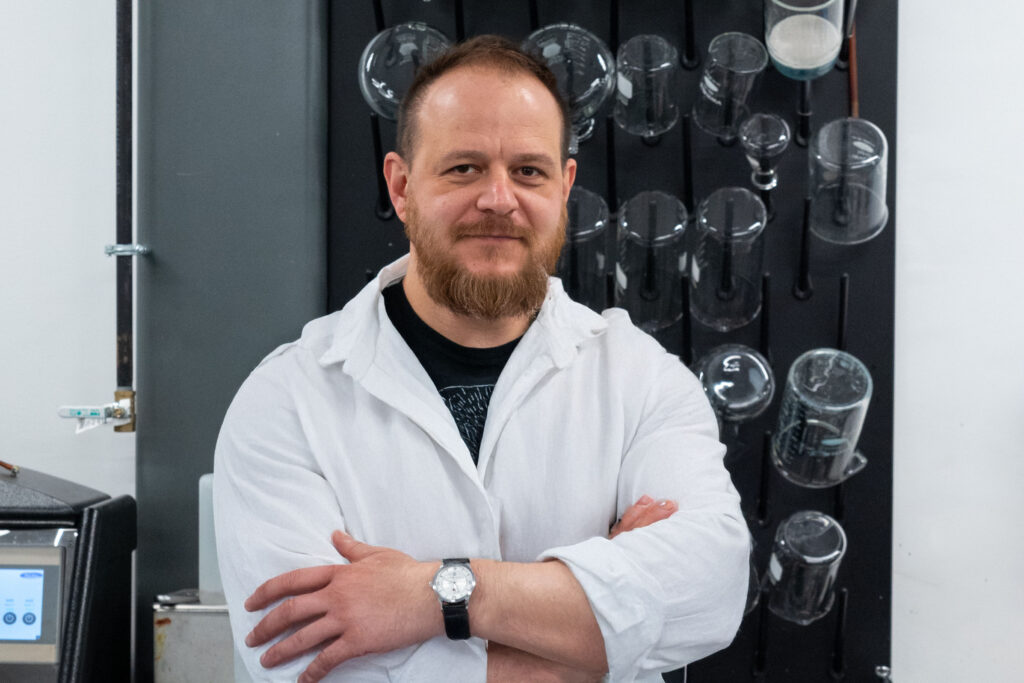
Alex, how long have you been with Sawgrass?
I have been with Sawgrass for 8 years. I started as a Product Development chemist and currently I am a director of Research and Development and Quality Control.
What are your main responsibilities here?
- Every day Quality Control of manufactured inks. We make all inks here in Charleston, SC and we have a Quality Control lab where we check the quality of manufactured inks
- Resolving customers issues. We do have a customer support teams at Sawgrass but some issues need further testing in our R&D lab
- Working on new formulations and changing/testing some of our existing formulations
- Working on future printer developments
Can you describe a typical day for you here at Sawgrass?
Every day is different here and that’s what makes it interesting. Some days we must concentrate on resolving customers’ issues and some days we have time to work on research and development of future products.
We all think of you as the guy behind our inks. What makes Sawgrass Ink so special?
All our inks are manufactured and packaged here in Charleston, South Carolina. Then we ship our cartridges around the world. Most of our competitors buy inks from other countries and then just fill the cartridges with those inks. At Sawgrass we want to control the quality of our inks at every step starting from raw chemicals.
Also, our inks are water based and do not contain any harsh solvents.
What stands out to you about our ink manufacturing process?
When we make the new ink batch, we want to make sure that this ink has the same properties and color as the ink we made 3 years ago. We test the properties and colors of every new ink batch and compare it to our original ink batch. If everything matches, we release the ink to production where they fill the cartridges. If it does not pass QC we work on adjusting properties of the ink batch until it passes the QC.
After the ink batch is approved, we keep 2 liters of ink from each batch for 2 years. If a customer is having issues with printing, we can go back and re-check the same batch to see if it is an ink issue or not.
Our support team always talks about the expiration dates on our inks. Why do those matter?
Most of our inks have 2 years shelf life. After 2 years there could be ink particle agglomerations which can damage the printhead. This is why we recommend using all the inks before the expiration date
One of the unique features of sublimation ink is its viscosity. Can you explain what that means and how it prevents clogs?
Viscosity is basically a measure of fluids resistance to flow. For example, water flows freely and the viscosity of it is very low. Honey takes much more time to flow because it is very viscous. Our inks are more viscous than water but less viscous than honey. When we formulate the inks, we need to adjust the viscosity to a certain level specific to each printhead. If you try to use inks which were not made for the printer they can have lower or high viscosity than needed and this can cause clogs and missing nozzles
I’ve been asked them many times; do you need to replace the ink before the cartridge is empty?
You do not need to replace the cartridge before it is empty. When it is time to replace the cartridge printer will have a message on the screen.
It’s always warm here, but I know it’s cold in other parts of the world. Does that impact our inks?
For the best performance we recommend that printing environment temperature is from 15 to 25 Celsius and humidity is from 40 to 60%
We say that we have one of the few printers that are purpose built specifically for sublimation printing. Why is that important?
Sublimation ink is different from office printer ink. This is why it was important to develop a printer made specifically for sublimation. There are several features in our printer which we developed specifically for sublimation. One of them is auto-cleaning option where printhead cleans itself automatically. This helps to avoid nozzle clogging issues and waste of paper. We also adjusted printer firmware so that it prints better quality images with sublimation inks
One final question: what are some things you recommend to Sawgrass Printer Owners to make sure they are getting the most out of their machines?
- Do not use 3rd party cartridges. They can damage the printhead and produce prints of poor quality
- Keep the printer powered on so it can do automatic cleanings
- Do not store printers outside or in the garage
Thank you so much for your time Alex! We hope you learned some things about Sawgrass and our Ink. Tune in next month for another insightful interview with our Sawgrass Team!
Skill Level: Basic
Tools & Supplies to Make It:
- MySawgrass+ Membership
- Sawgrass SG500 or SG1000 Printer
- Sublijet UHD Inks
- TruePix paper
- Flat Press
- 8.5”x11” or larger sublimation paper
- Circle Acrylic Ornament
- Heat Tape
How to Create It:
- Log into MySawgrass and from the Landing Page choose Design.
- For your product, select the Circle Acrylic Ornament by opening the Holiday category or using the search bar.
- Once the design tool opens, you can add your design.
- Open the DESIGNS panel of the design tool and select the Peppermint_Name_Ornament design. You can find the design in the Candy Cane Lane category or by searching directly using the search bar.
- This design is sized perfectly for circle ornaments so the design to should fill the artboard seamlessly.
- Customize the name by clicking the text field and editing using the text panel.
- When your design is finished, hit the Print button and then on the Print Screen click on Print File.
How to Print It:
- You should get a popup that asks if you want to open Sawgrass Print Utility. You will need to click Open Sawgrass Print Utility. If you are not seeing this, you’ll need to disable your popup blocker.
- In Sawgrass Print Utility, start by scrolling down and making sure your print orientation is set to Landscape.
- For this project, you can use the preset for Acrylic Sign.
- Make sure that the media size and type match what you have in the printer.
- On the Color Management Tab, we suggest having the Color Mode set to Vibrant.
- When you’ve confirmed all of your settings, Hit Print.
How to Press It:
- Turn on your press on and set the temperature to 370F degrees
- Place the ornament face-down on the paper and secure it with heat-resistant tape.
- Press the ornament for 90 seconds at medium pressure
- When finished, remove the ornaments.
Tips & Tricks:
- Files from the MySawgrass design tool will come into the Sawgrass Print Utility as separate jobs. you can use the merge feature to combine them into one job and print them on the same piece of paper.
- When using a flat press, it’s always a good idea to use protective paper to ensure excess ink doesn’t get on the press or the product.
Follow along as we.make this project. We’ve added this step-by-step video in English and Spanish!
Skill Level: Intermediate
Tools & Supplies to Make It:
- MySawgrass+ Membership
- Sawgrass SG500 or SG1000 Printer
- Sawgrass Sublijet UHD Inks
- TruePix paper
- Flat Press
- 8.5”x11” or larger sublimation paper
- Leather Placemat
- Heat Tape
How to Create It:
- Log into MySawgrass and from the Landing Page choose Design.
- For your product, select the Leather Placemat by opening the Kitchen & Dining category or by using the search bar.
- Once the design tool opens, you can add your design.
- Open the DESIGNS panel of the design tool and select the Merry_Checkerboard_Placemat design. You can find the design in the Candy Cane Lane category or by searching directly using the search bar.
- This design was made specifically for the leather placemat, so once you click, it should fill the artboard seamlessly.
- Once the design is in place, hit the Print button and then on the Print Screen click on Print File.
How to Print It:
- You should get a popup that asks if you want to open Sawgrass Print Utility. You will need to click Open Sawgrass Print Utility. If you are not seeing this, you’ll need to disable your popup blocker.
- In Sawgrass Print Utility, start by scrolling down and making sure your print orientation is set to Landscape.
- Even though this material is leather, for this project, you can use the preset for Polyester.
- Make sure that the media size and type match what you have in the printer. On the Color Management Tab, we suggest having the Color Mode set to Vibrant.
- When you’ve confirmed all of your settings, Hit Print.
How to Press It:
- Turn on your press on and set the temperature to 385F degrees
- If you see any dust, lint roll your print area to make sure your surface is clean.
- Lay your placemat facedown on to the printout and secure with heat-resistant tape.
- Press the placemat for 45 seconds at medium pressure
- When finished, remove the placemat.
Tips & Tricks:
- In the Sawgrass Print Utility, using the centering function can help you when positioning your print onto your product.
- Pressure on this should be on the lighter side of medium. If your paper is sticking to your placemat during pressing, you will want to lighten your pressure slightly.
Skill Level: Beginner
Tools & Supplies to Make It:
- MySawgrass+ Membership
- Sawgrass SG500 or SG1000 Printer
- Sawgrass Sublijet UHD Inks
- TruePix paper
- Flat Press
- 8.5”x11” or larger sublimation paper
- Pink Glitter Stocking
- Heat Tape
How to Create It:
- Log into MySawgrass and from the Landing Page choose Design.
- For your product, select the Pink Glitter Stocking by opening the Holiday category or using the search bar.
- Once the design tool opens, you can add your design.
- Open the DESIGNS panel of the design tool and select the Candy_Cane_Heart Monogram design. You can find the design in the Candy Cane Lane category or by searching directly using the search bar.
- Size the monogram to fit the stocking – approximately 6.137” x 5.383”
- Customize the initial by clicking the text field and editing using the text panel.
- When your design is finished, hit the Print button and then on the Print Screen click on Print File.
How to Print It:
- You should get a popup that asks if you want to open Sawgrass Print Utility. You will need to click Open Sawgrass Print Utility. If you are not seeing this, you’ll need to disable your popup blocker.
- In Sawgrass Print Utility, start by scrolling down and making sure your print orientation is set to Landscape.
- For this project, you can use the preset for Polyester T-shirt.
- Make sure that the media size and type match what you have in the printer. On the Color Management Tab, we suggest having the Color Mode set to Vibrant.
- When you’ve confirmed all of your settings, Hit Print.
How to Press It:
- Turn on your press on and set the temperature to 355F degrees
- Place the stocking face-down on the paper and secure it with heat-resistant tape.
- Make sure you lay the stocking on the heat press flat.
- Press the stocking for 60 seconds at medium pressure
- When finished, remove the stocking.
Tips & Tricks:
- Because of the seams on the edges of the stocking, a pressing pillow inserted inside gives you a flatter surface and a better press
- When a product has material of a different texture, or zippers, position the product so those are outside of the press if possible to prevent damage.
Skill Level: Beginner
Tools & Supplies to Make It:
- MySawgrass+ Membership
- Sawgrass SG1000 Printer + Bypass Tray
- Sawgrass Sublijet UHD Inks
- TruePix paper
- Flat Press
- 13”x19” sublimation paper
- Santa Sack
- Heat Tape
How to Create It:
- Log into MySawgrass and from the Landing Page choose Design.
- For your product, select the Santa Sack by opening the Holiday category or by using the search bar.
- Once the design tool opens, you can add your design.
- Open the DESIGNS panel of the design tool and select the North_Pole_Santa_Sack design. You can find the design in the Deck The Halls category or by searching directly using the search bar.
- While this design was made specifically for the Santa Sack, you made need to size down for optimal printing. We recommend an approximate size of 12.75” x 17.40.”
- Personalize your sack with a custom name by clicking on the name text field and using the text editing panel.
- Once the design is in place, hit the Print button and then on the Print Screen click on Print File.
How to Print It:
- You should get a popup that asks if you want to open Sawgrass Print Utility. You will need to click Open Sawgrass Print Utility. If you are not seeing this, you’ll need to disable your popup blocker.
- In Sawgrass Print Utility, start by scrolling down and making sure your print orientation is set to Portrait.
- Set your print preset to Polyester T-shirt.
- Make sure that the media size and type match what you have in the printer. On the Color Management Tab, we suggest having the Color Mode set to Vibrant.
- When you’ve confirmed all of your settings, Hit Print.
How to Press It:
- Turn on your press on and set the temperature to 400F degrees
- Place your design face down on the sack and secure with heat-resistant tape.
- Press the sack for 45 seconds at medium pressure.
- When finished, remove the paper and reveal the magic.
Tips & Tricks:
- While this product has a large print area, if you do not have a bypass tray on your SG1000, or you have an SG500, just use this design on a custom canvas set to your largest paper size. Add the design to that and then print and press.
- Lint rolling fabric items before pressing helps remove any fibers or dust that may leave stray marks on your pressed item if not removed.
Please follow along below in English or Spanish!