
Skill Level: Beginner
Tools & Supplies to Make It:
- MySawgrass+ Membership
- Sawgrass SG500 or SG1000 Printer
- 12″x12″ or larger Flat Press
- 8.5″ x11″ or larger sublimation paper
- Wooden Cheese Board w/ Handle
- Lint-free cloth and alcohol
- Heat tape
- Blowout paper
How to Create It:
- Log into MySawgrass and from the Landing Page choose Design.
- For your product, select the Wooden Cheese Board with Handle. It can be found under Kitchen & Dining.
- On the Create Your Design panel, click on Designs. Click on the filter icon and then select Thanksgiving and click Apply.
- You will need to hit More, and then scroll down to find the Gather Together design.
- The image seems to be sized perfectly for the area, but if you wanted to reduce the image size, use your mouse to lasso around the images and select them all as a group. Then, use the resize icon on the group to reduce the size. It should stay centered.
- If you’d like to change the background color, click the background button above with the pencil (edit) icon. You can make the background any color you wish by using the swatches or the sliders. You can also look up Hex Codes by searching for things like Fall Background Hex Code.
- When your design is finished, hit the Continue button to move to the Product Details page.
- You’ll be prompted to name your design, put it in a Category folder, and then hit save.
- On the Product Detail page, you’ll give the project a name and add a description, then hit print.
How to Print It:
- You should get a popup that asks if you want to open Sawgrass Print Utility. You will need to click Open Sawgrass Print Utility. If you are not seeing this, you’ll need to disable your popup blocker.
- In the Sawgrass Print Utility, start by scrolling down and make sure your print orientation is set to Landscape.
- For this project, you can use the preset Ceramic Coaster. Though this time is larger than a coaster, the printer settings will be the same.
- Make sure that the media size and type match what you have in the printer.
- On the Color Management tab, we suggest having Color Mode set to Vibrant.
- When you’ve confirmed all of your settings, hit Print.
How to Press It:
- Turn your press on and set the temperature to 400 degrees Fahrenheit and set the time to 2 minutes and 30 seconds. Pressure should be moderate.
- Prepare your ceramic tile by using a lint-free cloth and alcohol to remove any fibers or dust.
- Place your design face down on the tile and tape it down.
- Place the tile on the lower platen of the press with the printer page on top.
- Place a piece of blowout paper on top.
- Close the press and wait 2 minutes and 30 seconds before opening the press and remove the printed tile.
Tips & Tricks:
- Ceramics hold the heat! Be extremely careful removing it from the press and be careful where you lay it to cool as you do not want to burn your counter.
- This is a very versatile design. You can make it your own by changing the text, the background color, or even the colors of the pumpkins!
Skill Level: Intermediate
Tools & Supplies to Make It:
- MySawgrass+ Membership
- Sawgrass SG500 or SG1000 Printer
- 15″x15″ or larger Flat Press
- 11″x17″ or larger sublimation paper
- Glitter Tote Bag
- Lint roller
- Heat tape
- Blowout paper
How to Create It:
- Log into MySawgrass and from the Landing Page choose Design.
- For your product, select the Glitter Tote Bag. It can be found under Bags & Totes.
- On the Create Your Design panel, click on Designs. Click on the filter icon and then select Ivy Pink and click Apply.
- Choose the Happy Halloween design.
- The image seems to be sized perfectly for the area, but if you wanted to reduce the image size, use your mouse to lasso around the images and select them all as a group. Then, use the resize icon on the group to reduce the size. It should stay centered.
- If you are not able to print full bleed and press it onto the bag, you can delete the background. On the top menu, hit the trash can icon next to the work background and delete.
- When your design is finished, his the Continue button to move to the Product Details page.
- You’ll be prompted to name your design, put it in a Category folder, and then hit save.
- On the Product Detail page, you’ll give the project a name and add a description, then hit print.
How to Print It:
- You should get a popup that asks if you want to open Sawgrass Print Utility. You will need to click Open Sawgrass Print Utility. If you are not seeing this, you’ll need to disable your popup blocker.
- In the Sawgrass Print Utility, start by scrolling down and make sure your print orientation is set to Portrait.
- For this project, you can use the preset Canvas Tote Bag.
- Make sure that the media size and type match what you have in the printer.
- If you are not doing a full bleed tote, and your file is not quite fitting on the paper, you can go to the Design Files area and select Fit to Paper Size to reduce the print area to what you can accommodate.
- On the Color Management tab, we suggest having Color Mode set to Vibrant.
How to Press It:
- Turn your press on and set the temperature to 385 degrees Fahrenheit and the time to 45 seconds.
- Pressure should be medium.
- Prepare your bag by using a lint roller to remove any fibers or dust.
- Place your design face down on the bag and tape it down.
- Place the bag on the lower platen of the press with the printer page on top.
- Place a piece of blowout paper on top.
- Close the press and wait 45 seconds before opening the press and remove the printed bag.
Tips & Tricks:
- Getting lines on your fabric items? Ripping the edges of paper helps prevent those hard lines.
- Keep zippers outside of the press when possible. if this isn’t possible you can use a pressing pillow inside the bag to prevent damage to the zipper.
Skill Level: Beginner
Tools & Supplies to Make It:
- MySawgrass+ Membership
- Sawgrass SG500 or SG1000 Printer
- 12″x12″ or larger Flat Press
- 8×5″x11″ or larger sublimation paper
- Sequin Cosmetic Bag
- Alcohol wipes or Alcohol and a Lint-free cloth
- Heat tape
- Blowout paper
How to Create It:
- Log into MySawgrass and from the Landing Page choose Design.
- For your product, select the Flip Sequin Cosmetic bag. It can be found under Bags & Totes.
- On the Create your Design panel, click on Designs. Click the filter icon and then select Ivy Pink and click apply.
- Choose the trick or treat design, which should be first.
- The image seems to be sized perfectly for the area, but if you wanted to reduce the image size, use your mouse to lasso around the images and select them all as a group. Then, use the resize icon on the group to reduce the size. It should stay centered.
- When your design is finished, hit the Continue button to move the product details page.
- You’ll be prompted to name your design, put it in a Category folder, and then hit Save.
- On the Product Detail page, you’ll give the project a name and add a description, then hit Print.
How to Print It:
- You should get a popup that asks if you want to open Sawgrass Print Utility. You will need to click Open Sawgrass Print Utility. If you are not seeing this, you’ll need to disable your popup blocker.
- In the Sawgrass Print Utility, start by scrolling down and changing your print orientation to Landscape.
- We do not have a preset for Sequins, so make sure your settings are as follows:
- Under job settings, make sure mirror is clicked. Center on page will move the design to the middle of the paper.
- Your product should be Metal and your print quality should be High Quality.
- Make sure that the media size and type match what you have in the printer.
- On the Color Management tab, we suggest having the Color Mode set to Vibrant.
- When you’ve confirmed all of your settings, hit Print.
How to Press It:
- Turn your press on and set the temperature to 385 degrees Fahrenheit and the time to 45 seconds.
- Pressure should be light to medium.
- Make sure that all the sequins have the white side up,
- If there are fingerprints on the sequins, you can wipe those away with a lint-free cloth and alcohol.
- Place your design face up and then place the bag on it and tape the two together with heat-resistant tape.
- Place the bag on the lower platen of the heat press with the printer page on top.
- Place a piece of blowout paper on top.
- Close the press and wait 45 seconds before opening it and remove the printed bag.
Tips & Tricks:
- Flip the sequins back and forth once or twice immediately after removing paper to keep them from sticking.
- You an change the text on this design to make it even more yours!
Skill Level: Intermediate
Tools & Supplies to Make It:
- MySawgrass+ Membership
- Sawgrass SG500 or SG1000 Printer
- 15″x15″ or larger Flat Press
- 11″x17″ or larger sublimation paper
- Tan Leathaire Pillow Cover
- Lint roller
- Heat tape
- Blowout Paper
How to Create It:
- Log into MySawgrass and from the Landing Page choose Design.
- For your product, select the Tan Leathaire Pillow Cover. It can be found under Home Decor.
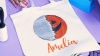
- On the Create Your Design Panel, click on Designs. Click on the filter icon and then select Flower Shop and click Apply.
- The mushroom and flower design should be the first one. Click on it to select it.
- To reduce the image size, use your mouse to lasso around the images and select them all as a group. Then use the resize icon on the group to reduce the size, It should stay centered.
- If you are not able to print full bleed and press it onto your pillow, you can delete the background. On the top menu hit the trash can icon next to the work background and delete.
- When your design is finished, his the Continue button to move to the product details page.
- You’ll be prompted to name your design, put it in a Category folder, and then hit save.
- On the Product Detail page, you’ll give the project a name and add a description, then hit print.
How to Print It:
- You should get a popup that asks if you want to open Sawgrass Print Utility. You will need to click Open Sawgrass Print Utility. If you are not seeing this, you’ll need to disable your popup blocker.
- In the Sawgrass Print Utility, start by scrolling down and making sure your print orientation is set to Portrait.
- For this project, there is not a preset. Your product is Polyester and your print quality is High Quality.
- Make sure that the media size and type match what you have in the printer.
- If you are not doing a full bleed pillow, and your file is not quite fitting on the paper, you can go to the Design Files area and select Fit to Paper Size to reduce the print area to what you can accommodate.
- On the Color Management tab, we suggest having the Color Mode set to Vibrant.
- When you’ve confirmed all of your settings, hit Print.
How to Press It:
- Turn your press on and set the temperature to 360 degrees Fahrenheit and set the time to 80 seconds.
- Pressure should be light.
- Prepare your pillow by using a lint roller to remove and fibers or dust.
- Place your design face down on the pillow and tape it down.
- Place the pillow on the power platen of the press with the printer page on top.
- Place a piece of blowout paper on top.
- Close the press and wait 80 seconds before opening it and removing the printed pillowcase.
Tips & Tricks:
- Getting lines on your fabric items? Ripping the edges of the paper helps prevent those hard lines.
- It is helpful to put a pressing pad or pillow in the pillow case to get a more even press and relieve pressure on the fabric.
- Keep zippers outside of the press when possible. If it is not possible, you can use a pressing pillow inside the pillow case to prevent damage to the zipper.
Skill Level: Intermediate
Tools & Supplies to Make It:
- MySawgrass+ Membership
- Sawgrass SG500 or SG1000 Printer
- Mug Pres or Tumbler Press
- Mug Paper or larger sublimation paper
- Medium silicone wrap
- Enamel Camping Mug
- Lint-free cloth and alcohol
- Heat tape
- Blowout Paper
How to Create It:
- Log into MySawgrass and from the Landing Page choose Design.
- For your product, select the ’12oz Enamel Mug’. It can be found under Drinkware.
- On the ‘Create Your Design’ panel, click on Designs.
- Click on the filter icon, then select Gnomes and click Apply.
- Choose the first gnome, with a sunflower on her hat.
- The image seems to be sized perfectly for the area, but if you want to reduce the image size, use your mouse to lasso around the images and select them all as a group. Use the resize icon on the group to reduce the size.
- With the gnome selected, use the ‘duplicate’ button on the right to make a copy of her and add her to the other side of the mug.
- When your design is finished, hit the ‘Continue’ button to move to the product details page.
- You’ll be prompted to name your design and put it in a category folder. Do this, then click ‘Save’.
- On the Product Detail page, you’ll give the project a name and a description, then click ‘Print’.
How to Print It:
- You should get a popup that asks if you want to open Sawgrass Print Utility. You will need to click Open Sawgrass Print Utility. If you are not seeing this, you’ll need to disable your popup blocker.
- In the Sawgrass Print Utility, start by scrolling down and making sure your print orientation is set to ‘Landscape’.
- If you want to print multiples of the mug, modify the ‘Repeats’ under ‘Design Files’ and then add spacing between the two copies.
- For this project, you can use the preset ‘Stainless Steel Drinkware’.
- Make sure that the media size and type match what you have loaded in your printer.
- On the Color Management tab, we suggest having the Color Mode set to Vibrant.
- Once you’ve confirmed your settings, click Print.
How to Press It:
- Ensure your press is turned on. If you are using a tumbler press, set the temperature to 390 degrees Fahrenheit and the time to 250 seconds. Pressure should be set to Medium.
- Prepare your mug by using a lint free cloth and alcohol to wipe away any fingerprints or dust.
- After you have taped your design to the mug, use a silicone wrap to give you an even pressing surface.
- If you are using a mug press, you’ll need to put the mug in upside down.
- Once the press is closed, wait for the timer to count down.
- When the timer is completed, carefully remove the finished product!
Tips & Tricks:
- A silicone wrap helps give an even pressing surface so you do not have to worry about the lip of the mug.
- You can use a mug press, tumbler press, or convection oven for this project.
Skill Level: Beginner
Tools & Supplies To Make It:
- MySawgrass+ Membership
- Sawgrass SG 1000
- 15”x15” Heat Press or larger
- 11”x17” sublimation paper or larger
- Dog Bandana
- Lint Roller
- Heat Tape
- Blowout paper

How to Create It:
- Log into MySawgrass and from the Landing Page choose Design.
- In the “Blank Products” tab in the MySawgrass design tool click on the “Pet” icon, then click on “Pet Scarf” and choose your size.
- Click on “Apply” to continue
- Go to the “Elements” tab and click on the “Backgrounds” tab.
- Go to Patterns and search “Ghost.”
- Select the pattern and click “Done.”
- Scroll down to select fit on the left panel and move the “size” slider to fill the area to your preference and select “Done.”
- Here you can change background color, add a name or simply continue to print.
- Once you are happy with the design, choose “CONTINUE” from the top right panel.
- Give your design a name and add it to a category and click “Save.”
- Here, you can choose to add a description about your design or product and add it to your MySawgrass store or continue to print.
How To Print It:
- Click on the “Print” Icon at the top right this will open the Sawgrass Print Utility.
- In the Sawgrass Print Utility, the printer should be set on the Sawgrass SG 1000.
- Select the preset to “Polyester T-Shirts”
- Select paper size: “US Letter”
- Change Print Orientation to “Landscape” if your design is running off the page.
- Under the Color Management tab select “Vibrant” for the Color Mode.
- Click Print.
How to Press It:
- Turn on and set your heat press to 400F and your time to 45 Seconds.
- Run a lint roller over the pet scarf to remove any dust or fibers before sublimating.
- Place your design face down and center on the sign, tape down the printed design with heat tape on both sides.
- Place the bandana on the lower heat plate and cover the printed design with blowout paper and press for 45 seconds.
- Lift top plate and remove the printed design. Be careful, your design will be hot!
- Peel + Enjoy! Happy Halloween!
Tips & Tricks:
- Tear your design instead of cutting to reduce any unwanted press lines. You can also leave your paper larger than your bandana.
- Add your pet’s name for fun customization.
Skill Level: Intermediate
Tools & Supplies To Make It:
- Sawgrass+ Membership
- Sawgrass SG 1000
- 15”x15” Heat Press or larger
- 11”x17” sublimation paper or larger
- Glitter Patch
- Canvas Tote Bag
- Lint Roller
- Heat Tape
- Blowout paper
- Ruler
How to Create It:
- Log into MySawgrass and from the Landing Page choose Design.
- From the Product Menu, choose and open “Custom Canvas” and click on the “Die cut shapes” Icon then select the circle.
- Input your measurements in the correct units and then select “Design Your Canvas.”
- Go to “Designs” and filter to “Halloween.”
- Scroll until you find the “Cutest Pumpkin in the Patch” design.
- Select the text and delete, repeat for each word.
- Select and delete the greenery layer.
- Click and drag to select the pumpkin and face later. Resize to your patch. You can also resize one layer at a time. Select “layers” on the right side to expose different layers.
- Normally, we would suggest adding a background color. Since this is sequins, it is fine to leave the background white to emphasize the design.
- Once you are done, choose “CONTINUE” from the top right panel.
- Give your design a name and add it to a category and click “Save.”
- Here, you can choose to add a description about your design or product and add it to your MySawgrass store or continue to print.
How To Print It:
- Click on the “Print” Icon at the top right which will open the Sawgrass Print Utility.
- The printer should be set on the Sawgrass SG 1000.
- Select the preset for “Metal.”
- Paper size “US Letter,”
- Keep the Print Orientation to “Portrait.”
- Under the Color Management tab, select “Vibrant” for the Color Mode.
- Click Print.
How to Press It:
- Turn on and set your heat press to 400F and your time to 45 Seconds.
- Make sure that all sequins have the white side up.
- If there are fingerprints on the sequins, you can wipe those away with a lint free cloth and alcohol.
- Remove the backing from the patch and adhere to your garment.
- Place your design face down and center on the patch, tape down the printed design with heat tape.
- Place the tote on the lower heat plate and cover the printed design with blowout paper and press for 45 seconds.
- Slowly lift top plate and quickly remove the printed design.
Tips & Tricks:
- If adding a name to the tote, make sure to have your custom name already pressed and cooled before sublimating the glitter patch on.
- You can find your patch measurements on the packaging.
Skill Level: Intermediate
Tools & Supplies To Make It:
- MySawgrass+ Membership
- Sawgrass SG 500 or 1000
- Tumbler or Mug Press with 20 oz skinny tumbler attachment
- 8.5”x11” sublimation paper
- 20 oz Skinny tumbler
- Heat Tape
- Blowout paper
How to Create It:
- Log into MySawgrass and from the Landing Page choose Design.
- In the “Blank Products” window in the design tool click on the “Drinkware” Icon then scroll down and click on “20oz Stainless Steel Skinny Tumbler.” Click on “Apply” to continue
- Go to the “Designs” tab and click on the “Dia De Los Muertos” folder. Select the Sugar Skull MySawgrass+ pattern.
- Click on the design to “select all” and resize the design on the tumbler. Then click outside of the design to deselect.
- You may need to move, expand, or duplicate the design to get the best fit in the area.
- Once you are done, choose “CONTINUE” from the top right panel.
- Give your design a name and add it to a category. Then click “Save”
- Add a description about your design or product.
- Now we are ready to print, click on the “Print” Icon at the top right.
How To Print It:
- Click on the “Print” Icon at the top right this will open the Sawgrass Print Utility.
- The printer should be set on the Sawgrass SG 1000.
- Select the preset for “Tumbler.”
- Set your paper size to “US Letter.”
- Change Print Orientation to “Landscape.”
- Under the Color Management tab, select “Vibrant” for the Color Mode.
- Click on Print.
How to Press It:
- Turn on and set your tumbler heat press to 365F and your time to 60 Seconds.
- Place your design face down and center on the sign, tape down the printed design with heat tape on all sides.
- Since this design is a full wrap, you need to rotate during pressing. Place it in the press and press for 60 seconds the rotate and press for another 60 seconds
- Slowly open the tumbler press and quickly remove the printed design.
Tips & Tricks:
- Wipe your tumbler off with an alcohol wipe or alcohol on a lint free cloth to remove fingerprints and dust before pressing.
- Make sure to rotate the tumbler at least 45 degrees after the first sixty seconds to get an even result on a full wrap design.
Skill Level: Beginner
Tools & Supplies to Make It:
- MySawgrass+
- Sawgrass SG1000 Printer
- 15″x15″ or larger heat press
- 11″x17″ or larger sublimation paper
- White polyester t-shirt
- Lint roller
- Heat tape
- Blowout paper

How to Create It:
- Log into MySawgrass and from the Landing Page choose Design.
- In the Blank Products tab in the MySawgrass design tool, click the Clothing icon, then scroll down and click on Youth Solar Shirt-Sleeve T-Shirt. Click on Apply to continue.
- Go to the Designs tab and click on the Halloween folder. Select the pirate MySawgrass+ design.
- Click on the design to select all and resize the design on the t-shirt. Click outside of the design to deselect.
- Once you are done, choose Continue from the top right panel.
- Give your design a name and add it to a category, then click Save.
- Add a description about your design or product.
How to Print It:
- Click on the Print icon at the top right. This will open the Sawgrass Print Utility.
- The printer should be set on the Sawgrass SG1000.
- Select the preset for Polyester T-Shirts.
- Set your paper size to Tabloid.
- Make sure your print orientation is Portrait.
- Under the color Management tab, select Vibrant.
- Click Print.
How to Press It:
- Turn on and set your heat press to 400 degrees Fahrenheit and time to 45 seconds.
- Lint roll and pre-press your t-shirt for 5 seconds.
- Place your design face down 3 finger-lengths down from the neckline and center with the neck tag. Tape down the printed design with heat tape on both sides.
- Place the shirt on the lower heat platen and cover the printed design with blowout paper. Press for 45 seconds.
- Slowly lift the top platen and quickly remove the printed design.
Tips & Tricks:
- To avoid the press lines you often get when sublimating onto polyester, rip the edges of the paper outside of the printed area. By eliminating the sharp lines, you avoid the lines transferring onto your design.
- Pre-pressing your shirt to remove creases and lint-rolling your shirt to remove lint helps to ensure a great press.
If you’ve spoken to our Care Team in the United Kingdom, you may have spoken to Adam. He is a Senior Sawgrass Success Associate and provides customers with training and technical support as well as supporting colleagues with technical and escalated cases.
Adam’s favorite thing about working for Sawgrass is interacting with customers and enabling/helping them to be successful. Adam does the same for the rest of the team by assisting with difficult cases that could benefit from his technical know-how. He will also help some of our larger corporate European customers by going on-site for troubleshooting assistance.
Adam’s perfect weekend would look like being at seaside enjoying the sun, perhaps catching the latest DC or Marvel movie, or checking out who’s going to be in town for a live music or comedy show. He also really enjoys playing darts and even played at a semi-pro level for his division. He said it felt pretty cool signing a contract to play a sport he loved and that felt even better winning the trophies.
His favourite sublimation project would be the fun jigsaw puzzle option. You can gift a person and they don’t know what the gift is until completing it. This is a great personalized gift whether the person loves to put puzzles together of if they want to display it in a frame. A big tip Adam has for those who are new to sublimation is don’t limit your imagination, be creative, but more importantly, enjoy the process. We all start at the beginning. Your imagination is the only limit!