
One of our primary goals with the Sawgrass Print Utility was to create a program that includes as many customer workflows as possible. One place you see this is the multiple ways you can add your files to PrintMate, our print management software. Let’s take a look at those now!
Create Within the Sawgrass Print Utility
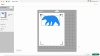
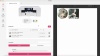
Unlike our previous print management programs, the print utility opens even without a file being open. With Sawgrass Print Utility open, you can hit the Create Button and then Add Files to add your design. You can add .avf, .bmp, .eps, .gif, .jpg, .pdf, .png, .svg, .tiff, and .webp files. Adding multiple files to one tab will put them all on the same page.
Send to Sawgrass Print Utility

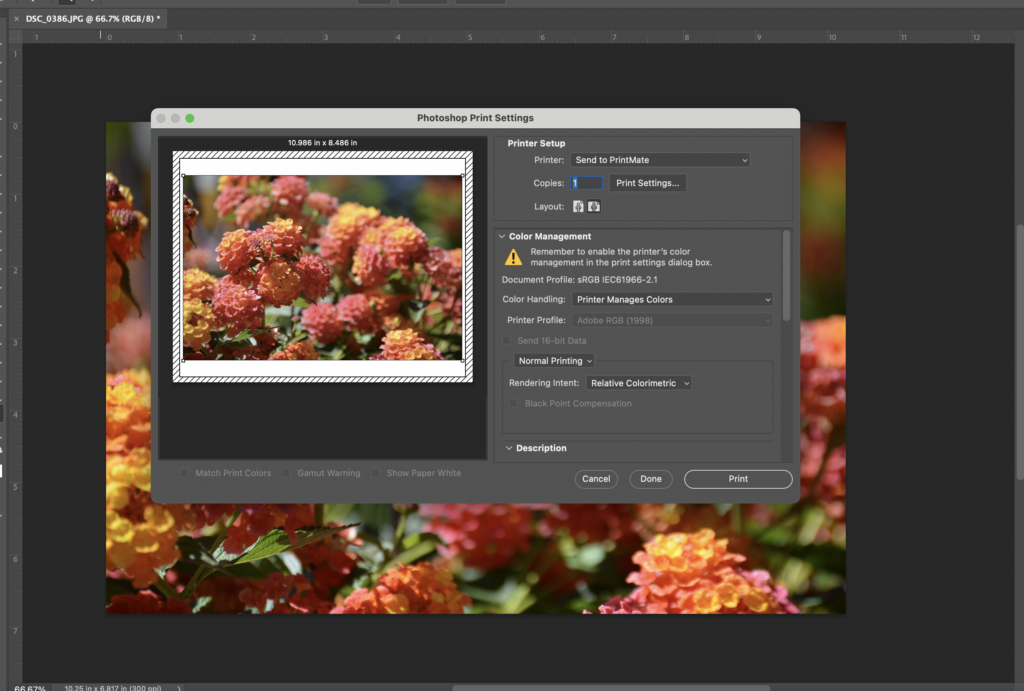
Users can send projects to the Sawgrass Print Utility from any program. This is as simple as when you go to File and then Print, you choose Send to Sawgrass Print Utility as your printer. For the first time, you can do this on both Windows and Mac operating systems.
Send to Sawgrass Print Utility: Before you hit Print
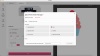
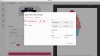
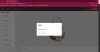
The biggest thing to remember when using the Send to Sawgrass Print Utility function, is that you need to configure your settings in the PrintMate application first. You’ll do this by going to Settings and then Send to Sawgrass Print Utility. You can configure your product type, as well as set any things like paper size and paper type. There is also an option to automatically print. This would mean that when you print to the Send to Sawgrass Print Utility option, it would apply your chosen settings and go straight to the printer without opening Sawgrass Print Utility first. If you have multiple printers, you’ll notice that you can select them all. This means that the program will send to the printer that was used the furthest in the past and not just the one selected. This will save users from remembering when printers were used, the system does the work for you.
Send to Sawgrass Print Utility: Print & Cut
Send to Sawgrass Print Utility works with print and cut from both Silhouette and Cricut design softwares. The above videos show the path from both. Like with any program, the key is choosing Send to Sawgrass Print Utility as the printer name.
Quick Print Folders

Another option for adding files to the Sawgrass Print Utility is to add them to a Quick Print Folder. Users can add as many folders as they like. Files are just dropped into the folders and then open in the print utility. Like with Send to Sawgrass Print Utility users should configure their settings in the print utility before dropping files in the folders. One setting that users will notice is the ability to pause a folder. This allows users to add files to the folder, but they will not open in PrintMate until the users set the folder to play.
Unless another location is chosen, these folders can be found on the computer desktop.
Quick Print Folders: Adding Additional Folders
When Sawgrass Print Utility is installed, one Quick Print Folder is automatically added to the computer desktop. Users can add other folders in the Quick Print Folder settings area of Sawgrass Print Utility. A good reason for this is if the user regularly prints different product types. Folders can be set up for each product type with the correct settings already chosen to ensure consistent output.
Quick Print Folders: Controlling File Deletion
Once a file is added to a Quick Print folder, the file will remain there after printing is complete. As with many aspects of the Sawgrass Print Utility, the user is in the driver’s seat with Quick Print Folders and controls how long files are kept in the Quick Print Folder. Users can choose how often the file delete, and clean up the folder at any time.
Printing from the MySawgrass design tool
Printing from the MySawgrass design tool works a little different than from other programs. Users of the Sawgrass design tool will see a Print button without the design area. Once they hit the Print button, they will choose if they want to print to the Sawgrass Print Utility or download a proof. When printing, users will see a popup asking them if they want to open PrintMate. Make sure that any popup blockers on the browser have been disabled so this can occur. Generally, if you hit Print and the Sawgrass Print Utility is not opening, this is why.
Printing from MySawgrass design tool: Merging multiple Jobs
If multiple design tool files are sent to the Sawgrass Print Utility, they will all come into the program as separate tabs. The ‘Merge Jobs’ button allows users to combine multiple tabs into one, allowing users to put the jobs on the same piece of paper.
As you can see, we have created multiple avenues to get your files into the Sawgrass Print Utility. This allows users to print how they want without needing a workaround.


