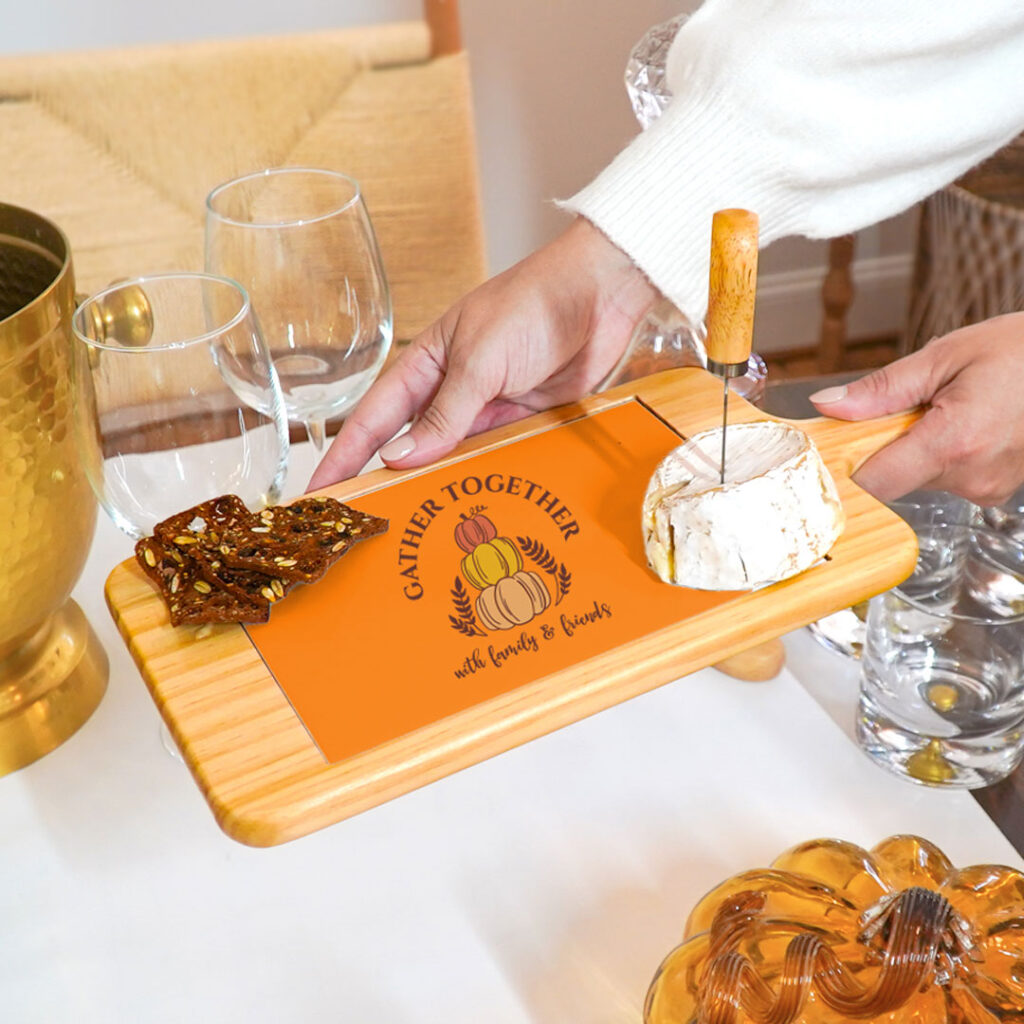
How to Make It: Thanksgiving Serving Board
This wooden cheese board with a ceramic insert is the perfect addition to any fall gathering.
Skill Level: Beginner
Tools & Supplies to Make It:
- DesignMate+ Membership
- Sawgrass SG500 or SG1000 Printer
- 12″x12″ or larger Flat Press
- 8.5″ x11″ or larger sublimation paper
- Wooden Cheese Board w/ Handle
- Lint-free cloth and alcohol
- Heat tape
- Blowout paper
How to Create It:
- Log into the Sawgrass Exchange and start a new creation in DesignMate.
- For your product, select the Wooden Cheese Board with Handle. It can be found under Kitchen & Dining.
- On the Create Your Design panel, click on Designs. Click on the filter icon and then select Thanksgiving and click Apply.
- You will need to hit More, and then scroll down to find the Gather Together design.
- The image seems to be sized perfectly for the area, but if you wanted to reduce the image size, use your mouse to lasso around the images and select them all as a group. Then, use the resize icon on the group to reduce the size. It should stay centered.
- If you’d like to change the background color, click the background button above with the pencil (edit) icon. You can make the background any color you wish by using the swatches or the sliders. You can also look up Hex Codes by searching for things like Fall Background Hex Code.
- When your design is finished, hit the Continue button to move to the Product Details page.
- You’ll be prompted to name your design, put it in a Category folder, and then hit save.
- On the Product Detail page, you’ll give the project a name and add a description, then hit print.
How to Print It:
- Make sure that you are seeing the popup to Open PrintMate and are hitting Open PrintMate. If you are not seeing this, you’ll need to disable your popup blocker.
- In PrintMate, start by scrolling down and make sure your print orientation is set to Landscape.
- For this project, you can use the preset Ceramic Coaster. Though this time is larger than a coaster, the printer settings will be the same.
- Make sure that the media size and type match what you have in the printer.
- On the Color Management tab, we suggest having Color Mode set to Vibrant.
- When you’ve confirmed all of your settings, hit Print.
How to Press It:
- Turn your press on and set the temperature to 400 degrees Fahrenheit and set the time to 2 minutes and 30 seconds. Pressure should be moderate.
- Prepare your ceramic tile by using a lint-free cloth and alcohol to remove any fibers or dust.
- Place your design face down on the tile and tape it down.
- Place the tile on the lower platen of the press with the printer page on top.
- Place a piece of blowout paper on top.
- Close the press and wait 2 minutes and 30 seconds before opening the press and remove the printed tile.
Tips & Tricks:
- Ceramics hold the heat! Be extremely careful removing it from the press and be careful where you lay it to cool as you do not want to burn your counter.
- This is a very versatile design. You can make it your own by changing the text, the background color, or even the colors of the pumpkins!